
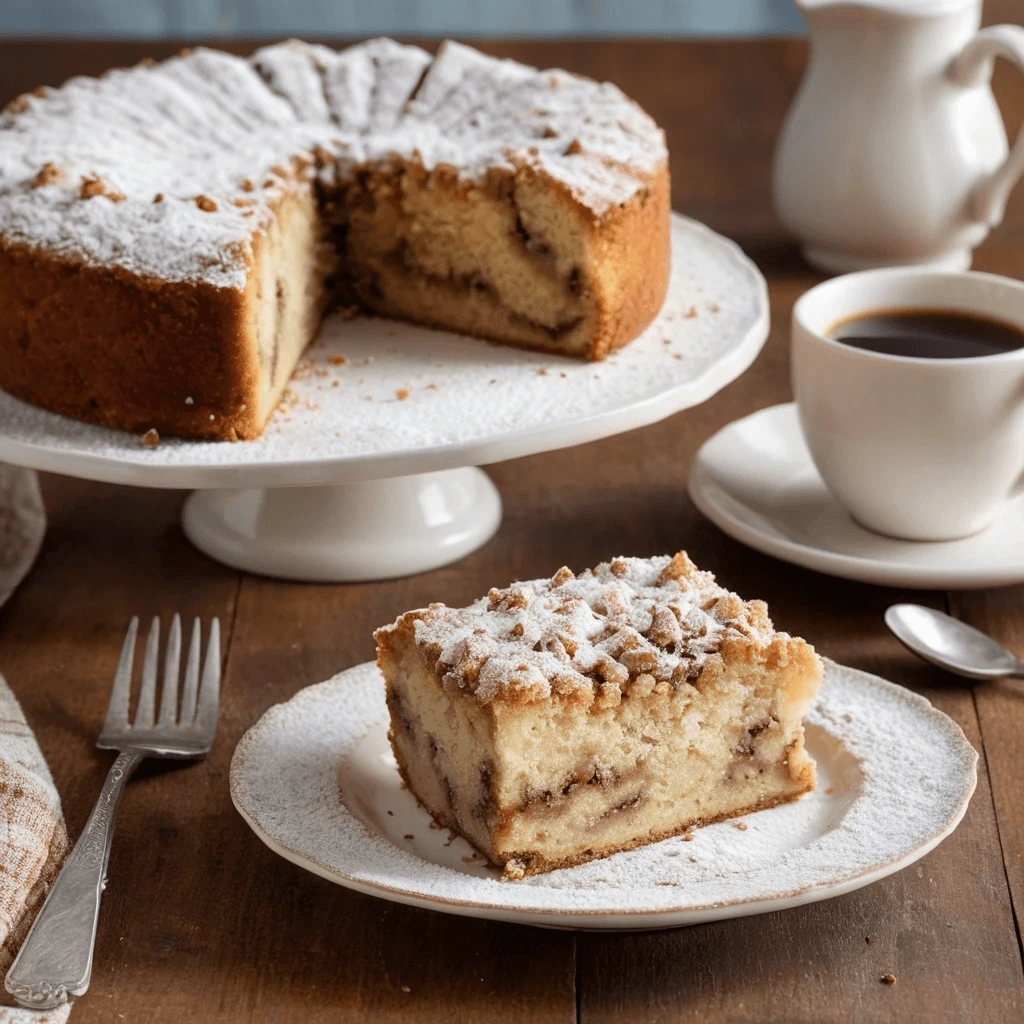
There’s something undeniably comforting about a warm slice of coffee cake recipe, fresh from the oven. It’s more than just a simple treat—it’s a tradition, a cozy companion to your morning cup of coffee, and a sweet indulgence that’s perfect for any time of day. Whether you’re sharing it with loved ones over brunch, enjoying it as a midday snack, or savoring it alone with a steaming mug of your favorite brew, coffee cake has a way of making everything feel just a little bit better.
With its soft, pillowy texture, aromatic spices, and sweet, crumbly topping, coffee cake offers the perfect balance of flavors and textures. And the best part? It’s incredibly versatile—whether you prefer a classic cinnamon flavor, the added richness of fruit, or a nutty crunch, there’s a coffee cake recipe for everyone. In this post, we’re diving into everything that makes coffee cake so irresistible, from its nostalgic origins to the secrets behind achieving the perfect crumb, and offering tips for creating your very own dreamiest version that will have everyone asking for seconds.
Why This Coffee Cake Recipe Is the Ultimate Comfort Treat
The nostalgia and warmth of homemade coffee cake
There’s something incredibly special about homemade coffee cake—it’s more than just a sweet treat; it’s a warm hug in dessert form. The rich aroma of cinnamon, butter, and brown sugar filling the kitchen instantly brings a sense of comfort and nostalgia.
For many, coffee cake is tied to cherished memories of cozy mornings with family, leisurely weekend breakfasts, or visiting a grandparent’s house where a slice was always waiting alongside a fresh cup of coffee or milk. It’s a simple yet heartwarming tradition that has been passed down through generations.
Unlike fancy, store-bought pastries, homemade coffee cake carries a personal touch. Every bite reflects the care and love that goes into making it—from mixing the batter to layering on the buttery crumb topping. Whether it’s served as a breakfast indulgence, an afternoon pick-me-up, or a dessert shared with friends, coffee cake has a way of bringing people together and making ordinary moments feel special.
What makes this coffee cake irresistibly soft and moist
A truly dreamy coffee cake isn’t just about the flavor—it’s all about texture. A perfect coffee cake should be incredibly soft, tender, and moist, with a delicate crumb that melts in your mouth. So, what’s the secret to achieving this?
1. The Power of Sour Cream or Buttermilk
One of the biggest factors in making coffee cake moist is using sour cream or buttermilk. These ingredients add richness while keeping the batter light and fluffy. Sour cream, in particular, contributes fat and acidity, which tenderizes the gluten and locks in moisture. Buttermilk, on the other hand, enhances softness and gives the cake a subtle tangy flavor that balances the sweetness.
2. The Right Balance of Fat and Flour
Using butter or oil in the right proportions ensures that the cake stays soft without becoming dense. Butter provides a rich, buttery taste, while oil can help retain moisture for longer. A combination of the two often works best. Additionally, the right amount of flour is crucial—too much can make the cake dry, while too little can make it too fragile.
3. Proper Mixing Technique
Overmixing the batter is one of the quickest ways to make a coffee cake tough. The key is to gently fold the ingredients together just until they are combined. Overworking the batter develops too much gluten, leading to a dense, chewy texture instead of a soft, delicate crumb.
4. A Well-Balanced Baking Process
Baking at the right temperature and for the right amount of time is essential. Too high of a temperature can cause the edges to overbake before the center is done, resulting in a dry cake. Baking at around 325°F to 350°F (163°C to 177°C) ensures even cooking. It’s also helpful to check for doneness with a toothpick—if it comes out with a few moist crumbs, it’s ready!
The secret ingredient that enhances flavor
While coffee cake is already a delightful treat, adding just the right secret ingredient can take its flavor to a whole new level. Many bakers swear by a unique addition that makes their coffee cake extra special—whether it’s a spice, an unexpected liquid, or a special type of sugar. Here are some of the best “secret ingredients” that can elevate your coffee cake and make it unforgettable.
1. A Touch of Almond Extract for Depth
While vanilla extract is a staple in most coffee cake recipes, a small amount of almond extract can add a rich, nutty undertone that enhances the overall flavor. Almond extract pairs beautifully with cinnamon, brown sugar, and butter, giving the cake a bakery-style depth that makes each bite more indulgent. Just a ¼ teaspoon is enough to make a difference without overpowering the cake.
2. Brown Butter for a Deep, Nutty Flavor
If you want to elevate the richness of your coffee cake, consider using brown butter instead of regular melted butter. Browning the butter before adding it to the batter intensifies its nutty, caramel-like aroma, making the cake taste more complex and sophisticated. The slightly toasted flavor enhances the streusel topping and gives your cake a gourmet touch.
3. A Dash of Espresso Powder for a Flavor Boost
You don’t need actual coffee in coffee cake, but a small amount of espresso powder can bring out the flavors of cinnamon and brown sugar even more. Espresso powder acts as a natural flavor enhancer, deepening the warmth of the spices without making the cake taste like coffee. Just ½ teaspoon mixed into the batter can work wonders.
4. Greek Yogurt for a Tangy Sweetness
If you want an ultra-moist texture with a hint of tang, replacing some of the sour cream or buttermilk with Greek yogurt can add extra flavor complexity. The mild tanginess balances the sweetness of the cake and enhances the buttery richness, making every bite more satisfying.
5. Maple Syrup for a Caramel-Like Sweetness
Instead of using only granulated sugar, adding a small amount of maple syrup to the batter can give your coffee cake a subtle caramelized flavor. Maple syrup pairs beautifully with cinnamon, pecans, and streusel topping, giving the cake a warm, cozy taste that’s perfect for fall and winter baking.
Essential Ingredients for the Perfect Coffee Cake
To ensure your coffee cake has the perfect texture and flavor, using the right ingredients is key. For a deeper understanding of the essential baking ingredients, check out this comprehensive guide on essential baking ingredients to help you choose the best products for your recipes.
Flour, sugar, and leavening agents
The foundation of any great coffee cake lies in the right balance of flour, sugar, and leavening agents. These ingredients work together to create the ideal texture—soft, fluffy, and perfectly sweet. Understanding their roles and how to use them properly can make all the difference between an average cake and one that’s truly exceptional.
1. Flour: The Structure of Your Coffee Cake
Flour is the backbone of coffee cake, providing structure and stability. Choosing the right type of flour and using the correct amount is crucial for achieving a soft, tender crumb.
Best Flour for Coffee Cake:
- All-Purpose Flour – The go-to choice for most coffee cake recipes. It has the right balance of protein to create a sturdy yet soft cake.
- Cake Flour (for an extra tender crumb) – If you prefer an ultra-light texture, swapping a portion of all-purpose flour with cake flour (which has a lower protein content) can make the cake even softer.
Pro Tip: To avoid a dense cake, measure flour correctly by spooning it into the measuring cup and leveling it off. Scooping directly from the bag can pack too much flour into the cup, leading to a dry texture.
2. Sugar: More Than Just Sweetness
Sugar does more than just make coffee cake sweet—it also impacts the texture, moisture retention, and browning of the cake.
Types of Sugar in Coffee Cake:
- Granulated Sugar – The standard choice for sweetness and structure. It helps create a tender crumb by keeping moisture locked in.
- Brown Sugar (for depth and moisture) – Adds a subtle caramel-like richness due to its molasses content, which also keeps the cake extra moist. This is often used in both the batter and the crumb topping.
- Powdered Sugar (for finishing touches) – Often dusted on top for an elegant, bakery-style look or mixed into glazes.
Pro Tip: If you want a deeper, more complex flavor, use a mix of granulated and light brown sugar in your batter!
3. Leavening Agents: The Secret to a Light and Fluffy Coffee Cake
Leavening agents are responsible for making coffee cake rise, giving it that soft and airy texture. The most common ones are baking powder and baking soda, and each plays a unique role.
Types of Leavening Agents:
- Baking Powder – A combination of an acid and a base, it creates air bubbles when mixed with liquid, helping the cake rise. Most recipes use 1 to 2 teaspoons to give the cake a light, fluffy texture.
- Baking Soda (if the recipe includes acidic ingredients) – Works in combination with ingredients like sour cream, buttermilk, or Greek yogurt. It neutralizes acidity while adding extra lift to the cake.
Pro Tip: Never swap baking soda and baking powder 1:1—they react differently. If a recipe calls for sour cream or buttermilk, you’ll likely need some baking soda to help neutralize the acidity and create the perfect rise.
Dairy essentials
Dairy plays a crucial role in creating a coffee cake that is rich, moist, and tender. It enhances the texture, adds flavor, and contributes to the overall structure of the cake. From sour cream to buttermilk and butter, each dairy ingredient has a unique function that transforms a simple coffee cake into a bakery-quality masterpiece.
1. Butter: The Foundation of Flavor and Moisture
Butter is one of the most important dairy ingredients in coffee cake. It provides richness, tenderness, and that signature buttery taste that makes every bite melt in your mouth.
Why Butter Matters:
- Adds flavor—real butter has a deep, creamy taste that enhances the overall richness of the cake.
- Contributes to a moist and tender texture by coating the flour and preventing excess gluten development.
- Helps create a light and fluffy cake when creamed with sugar, as it traps air pockets in the batter.
Pro Tip: Using room-temperature butter ensures proper aeration when mixing, leading to a lighter, softer crumb. For a slightly deeper flavor, you can also use brown butter, which has a nutty, caramelized taste.
2. Sour Cream or Greek Yogurt: The Secret to a Moist and Tangy Cake
Sour cream and Greek yogurt are game-changers when it comes to coffee cake. Their thick, creamy texture adds moisture without making the cake too wet, and their natural acidity helps tenderize the crumb.
Why Use Sour Cream or Greek Yogurt?
- Adds richness and keeps the cake from drying out.
- The acidity in these dairy products interacts with the baking soda to create an extra tender and soft cake.
- Enhances the depth of flavor, giving the cake a subtle tangy contrast to its sweetness.
Pro Tip: Full-fat sour cream or Greek yogurt works best for maximum moisture and richness. If using Greek yogurt, opt for plain and unsweetened to avoid altering the cake’s sweetness.
3. Buttermilk: A Light and Tender Touch
Buttermilk is another fantastic addition to coffee cake, known for its ability to create a soft, fluffy texture. Like sour cream, it has acidity, which helps with both flavor and structure.
How Buttermilk Enhances Coffee Cake:
- Reacts with baking soda to produce carbon dioxide, helping the cake rise.
- Softens the crumb and prevents the cake from becoming too dense.
- Adds a subtle tang that balances out the sweetness, making the flavors more complex.
Pro Tip: If you don’t have buttermilk on hand, you can make a quick substitute by mixing 1 cup of milk with 1 tablespoon of lemon juice or vinegar. Let it sit for 5-10 minutes before using.
4. Milk or Heavy Cream: A Smooth and Balanced Addition
While sour cream, yogurt, and buttermilk are the stars of the show, regular milk or heavy cream can also play an important role, especially in glazes and streusel toppings.
Best Uses for Milk and Cream:
- Helps create a smooth, pourable batter that’s not too thick or too dry.
- Used in the vanilla glaze to make it silky and smooth.
- Heavy cream in the streusel topping adds a delicate richness and makes the crumbs extra crispy.
Pro Tip: Whole milk works best in coffee cake recipes because it has a balanced fat content that contributes to a softer texture. Avoid using skim milk, as it lacks the necessary fat for richness.
Flavor boosters
A great coffee cake is more than just flour, sugar, and butter—it’s the layers of flavor that make each bite truly unforgettable. While the classic combination of cinnamon and vanilla is delicious, adding a few flavor boosters can take your coffee cake from good to extraordinary. Here’s how you can enhance the depth, warmth, and richness of your coffee cake with spices, extracts, and mix-ins.
1. Vanilla Extract: The Backbone of Baked Goods
Vanilla may seem like a simple ingredient, but it’s a game-changer in coffee cake. It enhances sweetness, rounds out flavors, and brings out the richness of butter and sugar.
Ways to Use Vanilla:
- Add 1–2 teaspoons of pure vanilla extract to the batter for a smooth, sweet, and warm aroma.
- For a stronger vanilla punch, use vanilla bean paste or the seeds from a fresh vanilla pod.
- If making a glaze, a dash of vanilla extract adds depth to the sweetness.
Pro Tip: Opt for pure vanilla extract instead of artificial flavoring for the best taste.
2. Warm Spices: A Cozy, Aromatic Touch
Spices bring out the comforting, cozy essence of a coffee cake. Cinnamon is the most common, but adding a blend of warming spices can enhance complexity and create a bakery-style flavor.
Best Spices for Coffee Cake:
- Cinnamon – A classic choice that gives coffee cake its signature warmth.
- Nutmeg – Adds a slightly nutty, sweet aroma that pairs well with cinnamon.
- Cardamom – Offers a hint of citrusy, floral warmth for a unique twist.
- Allspice or Cloves – Small amounts bring a deeper, slightly spiced flavor.
Pro Tip: Use freshly ground spices whenever possible for a more vibrant taste. A small pinch of nutmeg or cardamom in the batter or streusel can make a huge difference!
3. Citrus Zest: A Bright, Fresh Boost
A little zest goes a long way! Adding lemon, orange, or even lime zest to your coffee cake batter can cut through the richness and add a fresh, slightly tangy dimension.
How to Use Citrus in Coffee Cake:
- Mix 1–2 teaspoons of lemon or orange zest into the batter for a subtle brightness.
- Add a pinch of zest to the crumb topping for an unexpected, delicious twist.
- For a citrus glaze, whisk powdered sugar with lemon juice instead of milk.
Pro Tip: Always zest the citrus before juicing—it’s much easier and prevents waste!
4. Coffee or Espresso Powder: Enhancing Depth and Warmth
Since it’s called coffee cake, why not add a hint of actual coffee? A small amount of espresso powder or finely ground coffee intensifies the warm, deep flavors without making it taste overly like coffee.
How to Use Coffee in Coffee Cake:
- Add ½ to 1 teaspoon of espresso powder to the batter for a rich, slightly roasted depth.
- Mix a tiny bit into the streusel topping to create a subtle mocha-like effect.
- Use strong brewed coffee instead of milk in a glaze for a flavorful drizzle.
Pro Tip: If you love a deep, caramelized taste, coffee pairs exceptionally well with brown sugar and cinnamon!
5. Nuts for Texture and Flavor
Adding nuts to your coffee cake can create a wonderful crunch and add a toasty, nutty depth of flavor.
Best Nuts for Coffee Cake:
- Pecans – Buttery and slightly sweet, perfect for a classic streusel topping.
- Walnuts – Earthy, slightly bitter, and balances the cake’s sweetness.
- Almonds – Delicate, nutty, and pairs well with citrus zest and vanilla.
Pro Tip: Toast the nuts before adding them to the batter or crumb topping to enhance their natural flavor and crispness.
6. Brown Butter: A Next-Level Trick
Want to intensify the richness of your coffee cake? Swap regular melted butter with brown butter. When butter is cooked over low heat, it develops a deep, nutty, almost caramel-like aroma that makes baked goods irresistible.
How to Brown Butter:
- Melt butter over medium heat, stirring constantly.
- It will start to foam, and you’ll notice brown specks forming at the bottom.
- Once it gives off a nutty aroma, remove it from heat and let it cool before using.
Pro Tip: Brown butter works wonderfully in the cake batter, crumb topping, or even the glaze!
The crumb topping
One of the most irresistible parts of a great coffee cake is its signature crumb topping. That golden, buttery layer of sweet crumbles adds texture, flavor, and visual appeal to every bite. The combination of crunchy, sweet, and slightly spiced crumbs perfectly contrasts with the soft, moist cake underneath. But what makes a perfect crumb topping, and how can you achieve that bakery-style crispness? Let’s break it down.
1. The Key Ingredients for a Perfect Crumb Topping
A well-balanced crumb topping needs just a few simple ingredients, but each one plays a crucial role:
Flour – Provides structure and ensures the crumbs hold their shape.
Brown Sugar – Adds sweetness and a rich, caramel-like flavor.
Butter – Binds everything together and creates a crumbly texture.
Cinnamon (or other spices) – Enhances warmth and depth.
Salt – Balances the sweetness and brings out the flavors.
Pro Tip: For extra crunch, you can mix in chopped nuts (pecans, walnuts, or almonds) or even rolled oats for a heartier texture.
2. The Secret to Achieving Large, Bakery-Style Crumbs
If you love big, chunky streusel pieces, the way you mix your crumb topping is key. Follow these steps for perfectly textured crumbles:
Use Cold Butter – Cut it into the dry ingredients instead of melting it. Cold butter helps create those clumps that hold their shape when baked.
Press and Squeeze the Mixture – Instead of overmixing, gently press the mixture together with your fingers to form larger chunks.
Chill Before Using – Let the crumb topping sit in the fridge for 10–15 minutes before sprinkling it over the batter. This helps prevent the butter from melting too quickly in the oven, keeping the crumbs distinct and crispy.
Pro Tip: If your crumbs are too fine, try adding a tablespoon of melted butter and tossing it in lightly to encourage clumping.
3. Should You Add the Crumb Topping Before or During Baking?
One common question when making coffee cake is when to add the crumb topping. Here’s what to do:
Before Baking – The classic method! The topping will bake into the cake, forming a slightly crisp but still soft layer.
Halfway Through Baking – If you want an extra crunchy texture, sprinkle half of the topping before baking, then add the rest in the last 10 minutes.
After Baking (Broil Method) – If you like super crisp crumbs, place the cake under the broiler for 1–2 minutes at the end of baking (watch closely!).
Pro Tip: If you’re worried about the crumbs sinking, lightly dust the batter with flour before adding the topping. This creates a slight barrier, keeping the crumbs in place.
4. Creative Variations for the Ultimate Crumb Topping
While a classic cinnamon-sugar crumble is always a winner, there are fun ways to switch things up!
Chocolate Crumb Topping – Add cocoa powder and mini chocolate chips for a mocha twist.
Coconut Crumb Topping – Mix in shredded coconut for a subtle tropical flair.
Honey Almond Streusel – Replace sugar with honey and mix in sliced almonds for a nutty crunch.
Apple Spice Crumb – Add a pinch of nutmeg, ginger, and apple pie spice for a fall-inspired version.
Pro Tip: Want to add a finishing touch? Drizzle vanilla glaze or caramel sauce over the crumb topping once the cake has cooled slightly!
Bringing It All Together: The Perfect Balance
The crumb topping is more than just a garnish—it’s an essential part of what makes coffee cake so irresistible. When done right, it provides a beautiful contrast between crispy, buttery crumbles and tender, moist cake.
Step-by-Step Guide to Making the Best Coffee Cake
Preparing the batter
The batter is the heart and soul of a great coffee cake. It determines the cake’s texture, moisture, and overall flavor. Whether you love a tender crumb, a rich buttery taste, or a hint of spice, the way you prepare your batter makes all the difference. Let’s break down each step to ensure your coffee cake turns out perfectly soft, fluffy, and flavorful every time.
1. Choosing the Right Ingredients for a Perfect Batter
A well-balanced coffee cake batter starts with high-quality ingredients. Here’s what you’ll need and why each component is important:
Flour – The foundation of the batter, providing structure and stability. All-purpose flour is best, but cake flour can be used for a lighter texture.
Leavening Agents (Baking Powder & Baking Soda) – These create lift and help the cake rise, making it light and airy.
Sugar – Adds sweetness and moisture. A combination of white sugar and brown sugar enhances flavor.
Butter or Oil – Fat contributes to tenderness and richness. Butter provides a classic flavor, while oil keeps the cake extra moist.
Eggs – Essential for structure and binding the ingredients together.
Dairy (Milk, Yogurt, or Sour Cream) – Keeps the batter moist and tender while adding a slight tanginess.
Flavor Enhancers (Vanilla, Cinnamon, Nutmeg, etc.) – These add depth and warmth to the cake.
Pro Tip: For an ultra-moist coffee cake, replace a portion of the butter with Greek yogurt or sour cream. This gives the cake a soft, melt-in-your-mouth texture.
2. Mixing the Batter: The Step-by-Step Process
Step 1: Cream the Butter and Sugar
- Using a hand mixer or stand mixer, beat softened butter and sugar together until the mixture becomes light and fluffy (about 2–3 minutes).
- This process aerates the batter, ensuring the cake bakes up soft and tender.
Pro Tip: If using oil instead of butter, whisk it directly with the sugar and eggs to ensure even distribution.
Step 2: Add the Eggs One at a Time
- Crack in the eggs one at a time, beating well after each addition.
- This prevents curdling and ensures a smooth, well-emulsified batter.
Pro Tip: Let your eggs come to room temperature before adding them—they’ll blend better and create a smoother texture.
Step 3: Mix in the Dairy and Flavorings
- Stir in vanilla extract, sour cream (or yogurt), and any spices like cinnamon or nutmeg.
- These ingredients add flavor depth and extra moisture to the batter.
Pro Tip: If using yogurt or sour cream, fold it in gently to maintain a light and airy texture.
Step 4: Incorporate the Dry Ingredients (Without Overmixing!)
- In a separate bowl, whisk together flour, baking powder, baking soda, and salt.
- Gradually add this dry mixture to the wet ingredients, mixing on low speed or folding gently with a spatula.
- Mix just until combined—overmixing can lead to a dense cake.
Pro Tip: If you want a slightly fluffier texture, sift the dry ingredients before adding them to the batter. This helps create an even crumb.
3. Checking for the Right Batter Consistency
The ideal coffee cake batter should be smooth, thick, and spoonable but not too runny or stiff. Here’s how to test it:
Too Thin? – If the batter feels too runny, add 1–2 tablespoons of flour to help it thicken.
Too Thick? – If the batter is too stiff, add a splash of milk or a bit more yogurt to loosen it.
Pro Tip: Coffee cake batter should have a consistency similar to thick pancake batter—easy to spread but not overly liquid.
4. Layering the Batter for Extra Flavor
Want to take your coffee cake to the next level? Layer the batter with a cinnamon-sugar filling or swirl!
How to Do It:
- Pour half of the batter into a greased baking pan.
- Sprinkle a generous layer of brown sugar, cinnamon, and chopped nuts (or mini chocolate chips for a fun twist!).
- Add the remaining batter on top and spread evenly.
- Use a butter knife to create gentle swirls for a marbled effect.
Pro Tip: Swirling in the filling instead of just layering it creates ribbons of flavor throughout the cake!
5. Getting Ready to Bake
Once the batter is ready:
Preheat the oven to 350°F (175°C).
Grease and flour your baking dish or line it with parchment paper for easy removal.
Spread the batter evenly in the pan, tapping it lightly to remove air bubbles.
Pro Tip: For an even bake, place the pan in the center of the oven and avoid opening the door too soon!
Making the streusel topping
The streusel topping is a signature component of a great coffee cake, bringing the perfect combination of sweetness, crunch, and buttery richness. It’s what takes a simple cake from good to amazing by adding an extra layer of flavor and texture. Whether you love it crispy or crumbly, getting the streusel topping just right is key to achieving that mouthwatering balance that makes each bite irresistible. Let’s walk through the essential steps to make the best streusel topping for your coffee cake.
1. Choosing the Right Ingredients for Streusel
A good streusel topping is built on a foundation of simple but essential ingredients. Here’s a breakdown of what you need:
Butter – The base of your streusel. It adds richness and helps the topping crisp up beautifully as it bakes. Cold butter is ideal for achieving chunky, crumbly bits.
Flour – The flour provides structure to your streusel. All-purpose flour is commonly used, but you can swap it with whole wheat flour for a slightly nutty flavor.
Brown Sugar – The best choice for your streusel, as it adds a wonderful molasses flavor and depth of sweetness. It also gives the topping a golden color as it bakes.
Cinnamon (and other spices) – For warmth and flavor, a touch of cinnamon (or even nutmeg) is a must. It enhances the richness of the streusel and adds complexity to the taste.
Salt – A small pinch of salt balances the sweetness of the sugar and elevates the overall flavor profile.
Pro Tip: For added texture and flavor, you can incorporate chopped nuts (walnuts, pecans, or almonds) or rolled oats into the streusel. These ingredients bring in a delightful crunch and complement the buttery sweetness.
2. Mixing the Streusel Topping
Making the streusel is an easy, straightforward process. The key to getting the perfect texture lies in how you mix the ingredients. Here’s a step-by-step guide:
Step 1: Cut the Butter Into the Dry Ingredients
- Start with cold butter and cut it into small cubes.
- In a large mixing bowl, combine flour, brown sugar, cinnamon, and salt.
- Add the cubed butter to the dry ingredients.
- Using a pastry cutter, fork, or your hands, cut the butter into the flour mixture until you get pea-sized clumps. You should end up with a mixture that’s coarse and crumbly, not smooth.
Pro Tip: The butter should be cold, not softened or melted. This helps create those crunchy, chunky pieces in your streusel. If your butter has softened too much, place the bowl in the fridge for a few minutes to firm it back up before continuing.
Step 2: Add Any Extra Ingredients
- If you want to enhance the streusel further, now is the time to add any additional chopped nuts or oats.
- Gently toss them in with your hands or a spoon to ensure they are evenly distributed throughout the mixture.
- Be careful not to overwork it—gentle mixing will maintain the crumbly texture.
Pro Tip: If using oats or nuts, toast them in a dry skillet for a few minutes before adding them to the streusel. This brings out the oils and enhances the flavor.
3. Achieving the Right Texture for Streusel
The perfect streusel topping should be a mix of crumbly and chunky, with larger pieces of sugar-coated butter and flour. You want to ensure the topping bakes up with a crisp and crunchy texture while staying sweet and melt-in-your-mouth soft in places. Here’s how to adjust the texture to your liking:
Crumbly Streusel – For a finer, more uniform topping, use a pastry cutter or fork to cut the butter more thoroughly into the flour mixture. This will result in smaller crumbs that provide a delicate, sweet topping.
Chunky Streusel – If you prefer larger clumps of streusel, make sure not to overwork the butter and flour mixture. Leave the pieces a bit larger for that rustic, bakery-style effect.
Pro Tip: If you want your streusel to be extra crunchy, you can add a tablespoon of oats or chopped nuts. They help add a delightful crunch and create more contrast to the soft cake beneath.
4. How to Apply the Streusel Topping
Now that your streusel is mixed, it’s time to add it to the cake! Here’s how to apply it to achieve the perfect finish:
Evenly Spread – Spoon the streusel evenly over the batter, ensuring that every inch is covered.
Gentle Press – Lightly press the streusel down into the batter to help it stick.
Layering – If your cake has a swirl or filling (such as cinnamon), consider sprinkling half of the streusel before baking, then adding the rest halfway through the baking time. This creates layers of streusel throughout the cake.
Pro Tip: You can make the streusel ahead of time and store it in the fridge. This allows the butter to chill and harden again, which will help the streusel hold its shape and crisp up as it bakes.
5. Baking Your Streusel-Topped Coffee Cake
As your coffee cake bakes, the streusel will rise and brown, creating a golden, crispy topping. This transformation adds a layer of richness and complexity to your cake. Depending on how thick your streusel layer is, the top may become slightly caramelized, adding an extra burst of flavor.
Pro Tip: Keep an eye on your streusel topping as the cake bakes, and if it starts to brown too quickly, cover it loosely with aluminum foil for the remainder of the bake time.
6. Enjoying the Streusel Topping
The best part? When the coffee cake is done baking, the streusel topping will have created the perfect contrast between crisp edges and soft, buttery crumbs. Every bite offers that crunchy, sweet, melt-in-your-mouth experience that’s nothing short of satisfying.
Pro Tip: Once your cake has cooled slightly, drizzle it with a glaze or sprinkle with powdered sugar for an extra touch of sweetness and elegance.
Baking tips
Baking a coffee cake that turns out just right—fluffy, moist, and with that perfect golden crust—requires more than just following a recipe. A few essential tips can make all the difference in the final product. Whether you’re an experienced baker or just starting out, these baking tips will help you create a cake that’s not only delicious but also visually stunning. Let’s dive into some helpful tricks to ensure your coffee cake bakes beautifully and consistently.
1. Use Room Temperature Ingredients
For a smooth, well-blended batter, it’s crucial to use room temperature ingredients, especially butter, eggs, and milk. Cold ingredients can cause the batter to curdle or not mix properly, resulting in an uneven texture. Here’s why room temperature ingredients matter:
Butter: Room temperature butter mixes better with the sugar, creating a smooth, fluffy batter. If the butter is too cold, it will create lumps that are hard to incorporate into the batter.
Eggs: Cold eggs can cause the batter to seize up or separate. Let the eggs sit out for 20–30 minutes before using them.
Milk: Using room temperature milk ensures that it incorporates seamlessly into the batter, creating an even consistency.
Pro Tip: If you forget to bring your ingredients to room temperature, you can soften butter quickly by cutting it into smaller pieces. For eggs and milk, place them in a warm water bath for 5–10 minutes.
2. Properly Prepare Your Pan
Properly greasing and lining your baking pan is key to ensuring your coffee cake comes out easily and doesn’t stick. Follow these steps to ensure a smooth release:
Grease the Pan: Use butter, oil, or a non-stick spray to coat the bottom and sides of your pan. This prevents sticking and allows for easy removal.
Flour the Pan: After greasing, lightly dust the pan with flour. Tap out any excess to create a non-stick barrier that helps your cake rise and release perfectly.
Use Parchment Paper: If you want an extra layer of insurance, line the bottom of your pan with parchment paper. This will make it easy to lift the cake out and helps avoid any sticking.
Pro Tip: For bundt pans, use cooking spray with flour built in. This is especially important if your cake has a lot of crumb topping or a sticky glaze.
3. Don’t Overmix the Batter
Overmixing the batter is one of the most common mistakes when baking cakes. Overmixing activates the gluten in the flour, leading to a dense and tough cake. Here’s how to avoid this:
Mix Until Just Combined: Once you add the flour to the wet ingredients, mix just until you no longer see streaks of flour. Some lumps are perfectly fine!
Use a Gentle Hand: Stir the batter with a wooden spoon or a rubber spatula to maintain a light touch. This will keep the batter airy and tender.
Pro Tip: If your recipe calls for adding a flour mixture and wet ingredients alternately, always begin and end with the dry ingredients. This ensures the batter stays light and fluffy.
4. Be Mindful of Oven Temperature
Oven temperature plays a significant role in the texture and rise of your coffee cake. If your oven is too hot, the cake might bake unevenly or burn on the outside before it’s done on the inside. If it’s too cool, your cake could be dense or undercooked. Here’s how to ensure the perfect baking environment:
Preheat the Oven: Always preheat your oven for at least 15 minutes before placing the cake inside. This helps the cake rise evenly and bake at the right temperature.
Use an Oven Thermometer: Oven temperatures can vary, so it’s worth investing in an oven thermometer to make sure your oven is at the correct temperature.
Don’t Open the Oven Door: While your coffee cake is baking, avoid opening the oven door frequently. This lets the heat escape and can cause the cake to collapse. Only check for doneness toward the end of the baking time.
Pro Tip: If you notice that the top of your coffee cake is browning too quickly, cover it loosely with aluminum foil for the last 10–15 minutes of baking to prevent overbaking.
5. Check for Doneness
Knowing when your coffee cake is done baking is crucial for avoiding a cake that’s either too wet or too dry. Here are a few reliable ways to test for doneness:
Toothpick Test: Insert a toothpick or cake tester into the center of the cake. If it comes out clean or with just a few moist crumbs attached, your coffee cake is done. If the toothpick comes out wet, it needs more time to bake.
Lightly Tap the Top: Gently tap the top of the cake. If it springs back, it’s a sign that the cake is done. If it leaves an indent, bake it for a few more minutes.
Even Color: The cake should be a rich, golden brown on top. If the edges are brown but the center still looks pale, it’s likely not done.
Pro Tip: Don’t rely solely on the timer. Every oven is different, so use your senses—visual cues and texture tests—to gauge when the cake is ready.
6. Let It Cool
Once your coffee cake is baked, it’s important to let it cool before serving. This allows the cake to set and firm up, making it easier to slice without falling apart. Here’s the best way to cool your cake:
Cool in the Pan for 10–15 Minutes: Allow your cake to rest in the pan for a few minutes after baking. This helps it release from the sides and prevents it from breaking when you remove it.
Transfer to a Wire Rack: After it has cooled slightly in the pan, transfer the cake to a wire rack to cool completely. This helps prevent the bottom from becoming soggy and ensures an even temperature throughout the cake.
Pro Tip: If you’re serving the cake warm, it’s okay to cut it while slightly warm, but if you want the cake to hold its shape perfectly, let it cool completely.
Adding the finishing touch
The final step in making your coffee cake is often the one that makes it truly irresistible. Adding those finishing touches not only enhances the appearance but also elevates the flavor, making each bite even more enjoyable. Whether it’s a glaze, a sprinkle of powdered sugar, or a unique topping, these small additions can transform your coffee cake from great to extraordinary.
1. Glaze for Extra Flavor and Shine
One of the simplest yet most impactful ways to finish off your coffee cake is by drizzling a glaze on top. This adds a touch of sweetness and a glossy, professional finish that makes your cake look like it came from a bakery. Here’s how to make the perfect glaze:
Basic Powdered Sugar Glaze: A classic glaze is made by mixing powdered sugar, milk, and a little vanilla extract. The glaze should be pourable but not too thin. For an added twist, you can also infuse the glaze with flavors like cinnamon, maple syrup, or even a splash of coffee.
Fruit or Citrus Glaze: For a refreshing burst of flavor, you can add fruit juice (such as orange, lemon, or berry) to the glaze. A lemon glaze works especially well with coffee cakes, balancing out the sweetness and adding a citrusy brightness.
Drizzle Generously: When applying the glaze, drizzle it generously over the warm cake so that it slowly seeps into the crumb, creating a delightful sweetness in every bite. The glaze also helps to hold any crumb topping or additional garnishes in place.
Pro Tip: Make the glaze just before you’re ready to use it. A freshly made glaze will spread more evenly, while one that’s been sitting may thicken and become difficult to work with.
2. Sprinkling Powdered Sugar for an Elegant Touch
Sometimes, the most elegant finishing touch is the simplest. A light dusting of powdered sugar is a quick and easy way to make your coffee cake look beautifully polished. Here’s how to do it right:
Even Coverage: Use a fine mesh sieve or sifter to evenly distribute powdered sugar over the top of your cooled coffee cake. This creates a delicate, snow-like effect that gives the cake a refined appearance.
Perfect for Rustic Coffee Cakes: If your coffee cake has a rougher texture or crumbly topping, the powdered sugar can help smooth out the overall look, adding a clean, bright contrast to the cake’s rich colors.
Add After Cooling: Always wait for your cake to cool before sprinkling powdered sugar on top. If you add it while the cake is still warm, the sugar may melt and disappear into the cake.
Pro Tip: If you’re using a glaze as well, it’s best to apply the glaze first and then lightly dust with powdered sugar afterward. This gives the cake a layered, professional look.
3. Crumb or Streusel Topping
For many people, the topping is the best part of a coffee cake. If you’ve made a streusel topping or crumb topping, adding a bit more before serving can add extra texture and flavor. The crunch of the topping contrasts perfectly with the soft, fluffy cake beneath. Here’s how to perfect this touch:
Add More Streusel: After baking, you can gently press a little extra streusel topping into the top of the coffee cake for a crunchier finish. If you didn’t use a topping before baking, you can add a layer of crushed nuts or brown sugar for some added texture and sweetness.
Reheat for Extra Crispness: If the topping has softened after baking, you can reheat the cake for a few minutes to crispen it up again before serving. This will refresh the topping and bring back its delightful crunch.
Layering the Topping: For an added visual element, you can layer your topping in a way that creates a staggered effect on the cake, with parts of the cake having a thicker, crunchier topping and others being more cake-heavy.
Pro Tip: For an even more decadent touch, you can drizzle a bit of butter over the topping right before serving. The butter will enhance the flavor and make the topping even more flavorful and satisfying.
4. Adding Fresh Fruits or Nuts
Fresh fruits or nuts can provide not only a visual contrast but also an extra layer of flavor. Here’s how to use fruits and nuts as the finishing touch:
Fresh Berries: Fresh blueberries, raspberries, or sliced strawberries can add a burst of color and freshness. They pair particularly well with coffee cakes that are on the sweeter side, helping balance the richness.
Sliced Nuts: For a more robust flavor, top your cake with sliced almonds, walnuts, or pecans. Nuts provide both texture and a deep, nutty flavor that complements the sweetness of the cake. Toast them lightly for an extra crisp and aromatic touch.
Citrus Zest: A sprinkle of lemon or orange zest can elevate the cake’s flavor profile, adding a pop of brightness and freshness that cuts through the richness of the cake.
Pro Tip: When adding fruit or nuts, place them on top just before serving to prevent them from becoming soggy or losing their texture.
5. Serve with a Side of Cream or Whipped Cream
For an indulgent finishing touch, serve your coffee cake with a side of whipped cream or a dollop of clotted cream. The creamy texture balances the cake’s moist crumb and adds a luxurious feel. Here’s how to elevate the presentation:
Whipped Cream: Freshly whipped cream is simple to make and can be flavored with a dash of vanilla or cinnamon for added complexity. Serve a spoonful on the side or place a dollop directly on each slice of cake for an elegant touch.
Mascarpone or Clotted Cream: For a richer treat, mascarpone or clotted cream can be served alongside your coffee cake. These creams add a silky texture and make the cake feel extra special.
Pro Tip: If you’re serving the cake at a brunch or holiday gathering, a few fresh mint leaves placed on top of the cream can make your coffee cake look even more sophisticated.
6. A Final Sprinkle of Cinnamon or Spice
The final touch you add can enhance the aroma and flavor of your coffee cake. A light sprinkle of cinnamon, nutmeg, or even a pinch of cocoa powder can deepen the cake’s flavor profile, especially if the spices are present in the cake itself.
Cinnamon Sugar: For a simple yet flavorful finishing touch, sprinkle a light dusting of cinnamon sugar over the top. This creates a beautiful, sweet contrast against the rich, soft cake.
Spices for Added Warmth: Nutmeg or cardamom are great additions for a warm, comforting feel, adding a bit of depth to the flavor of your cake without overwhelming it.
Pro Tip: If you’re using spices, be careful not to overdo it. A little sprinkle goes a long way, and you want the spices to complement, not overpower, the flavor of the cake.
Delicious Coffee Cake Variations to Try
Blueberry coffee cake
Blueberry coffee cake is a delightful variation of the traditional coffee cake that adds a burst of fresh, fruity sweetness to the classic recipe. The combination of juicy blueberries with the rich, tender crumb of the cake creates a perfectly balanced dessert that’s ideal for any occasion, from a leisurely morning breakfast to a festive brunch. The vibrant color and natural sweetness of blueberries pair beautifully with the warm, comforting flavors of cinnamon and vanilla, making each bite an indulgent experience.
1. The Magic of Blueberries in Coffee Cake
The beauty of blueberry coffee cake lies in its balance of flavors and textures. Blueberries offer not only sweetness but also a slightly tart edge that cuts through the richness of the cake, creating a refreshing contrast that makes the cake feel lighter and more refreshing. Here’s what makes them such a great addition:
Bursting Juiciness: Blueberries are naturally packed with juice, which when baked into the cake, infuses the crumb with bursts of flavor. The result is a moist, flavorful bite that makes the cake irresistible.
Vibrant Color: Fresh or frozen blueberries, when mixed into the batter, give the cake a gorgeous purple hue that adds visual appeal. Whether sprinkled throughout or layered on top, their presence makes the cake more inviting and eye-catching.
Nutritional Bonus: Blueberries are packed with antioxidants, vitamins, and fiber, making them a healthier choice for adding natural sweetness to your coffee cake. They also help keep the cake moist while enhancing its texture.
Pro Tip: If you’re using frozen blueberries, avoid thawing them before adding them to the batter. This helps prevent the juice from bleeding into the cake, which could cause the batter to turn blue. Tossing the frozen berries in a little flour before adding them to the mix also helps them stay evenly distributed.
2. Creating the Perfect Texture
The base of a blueberry coffee cake is still the soft, fluffy crumb of a classic coffee cake, but the inclusion of blueberries can alter the texture slightly. Here’s how you can ensure that your blueberry coffee cake maintains its tenderness while still incorporating the fruit:
Moist and Tender Crumb: Blueberries add moisture, so it’s important to balance the wet and dry ingredients in the batter. Make sure not to overmix the batter to prevent the cake from becoming dense. Gentle folding of the blueberries into the batter is key to retaining a light, airy texture.
Preventing Sinking: Blueberries tend to sink to the bottom of the cake if not properly incorporated. To avoid this, toss the blueberries with a little flour before folding them into the batter. This will help them stay suspended throughout the cake, ensuring an even distribution of fruit in each slice.
Fluffing Up the Crumb: If you want your coffee cake to have an even fluffier texture, you can add an extra egg or baking powder to the recipe to give the cake a little more rise. This will help keep the cake light and tender, even with the added moisture from the blueberries.
3. Complementary Flavor Pairings for Blueberry Coffee Cake
Blueberry coffee cake doesn’t just need blueberries to shine. You can elevate the flavor of your cake by pairing the fruit with a variety of spices and other ingredients that enhance its natural sweetness. Here’s how you can boost the flavor profile:
Cinnamon and Nutmeg: These warm, aromatic spices are a staple in coffee cakes and pair wonderfully with blueberries. The subtle heat of cinnamon and nutmeg balances the sweetness of the fruit and adds a depth of flavor that feels comforting and homey.
Lemon Zest: Adding lemon zest to your blueberry coffee cake provides a zesty contrast to the sweetness of the fruit. The bright, citrusy note elevates the overall flavor, giving it a refreshing pop that complements the richness of the cake.
Vanilla Extract: Vanilla enhances the natural sweetness of blueberries and adds a layer of warmth that marries well with the other spices in the cake. It’s an essential flavor booster that rounds out the cake’s flavor.
Brown Sugar: For an extra layer of depth and caramel-like sweetness, consider using brown sugar in your batter or streusel topping. It complements the berries and brings a subtle richness to the overall flavor of the cake.
Pro Tip: Try adding a teaspoon of almond extract to your batter for a nutty, aromatic note that pairs beautifully with the blueberries and spices.
4. The Streusel Topping: A Blueberry Coffee Cake Essential
No blueberry coffee cake is complete without a decadent streusel topping. The crumbly, buttery streusel is the perfect finishing touch, offering a contrast to the soft, moist cake beneath. Here’s how to make the perfect streusel topping for your blueberry coffee cake:
Buttery Crumb: The streusel should be buttery and crumbly, with a slightly sweetened crunch that complements the texture of the cake. Use cold unsalted butter and work it into the dry ingredients until the mixture resembles coarse crumbs.
Incorporating Nuts: For added flavor and texture, you can mix in chopped walnuts, pecans, or almonds into the streusel topping. These nuts add a delightful crunch and pair beautifully with the sweet blueberries.
Spice it Up: Just like with the cake, a little bit of cinnamon or nutmeg in the streusel topping can tie all the flavors together and add an extra layer of warmth.
Pro Tip: Make the streusel topping ahead of time and refrigerate it until you’re ready to use it. This will help it form larger clumps and create a more textured, crispy topping when baked.
5. Serving and Enjoying Blueberry Coffee Cake
Blueberry coffee cake is incredibly versatile and can be enjoyed in a variety of ways. Here are some suggestions for how to serve and savor it:
With a Hot Cup of Coffee: As the name suggests, blueberry coffee cake is perfect with coffee. The rich, warm flavors of the cake pair beautifully with a cup of coffee, whether it’s black, latte, or espresso.
At a Brunch or Celebration: This cake is an excellent choice for a weekend brunch, holiday gatherings, or even as a breakfast treat. Its bright flavor and visually appealing presentation make it a crowd-pleaser that will be the star of any occasion.
Warm or Room Temperature: Blueberry coffee cake can be served warm, straight from the oven, or at room temperature. While it’s delightful right after baking, it often tastes even better the next day as the flavors have time to meld.
Pro Tip: Serve your blueberry coffee cake with a dollop of freshly whipped cream or a scoop of vanilla ice cream for an indulgent dessert experience.
Pumpkin spice coffee cake
Pumpkin spice coffee cake is the ultimate fall-inspired treat, combining the warmth and comforting flavors of pumpkin and autumn spices with the classic soft, tender crumb of a traditional coffee cake. The result is a perfectly spiced, moist cake that’s ideal for cozy mornings, festive gatherings, or as a delightful addition to your holiday spread. If you’re a fan of pumpkin and fall flavors, this twist on a classic coffee cake will quickly become a favorite.
1. The Magic of Pumpkin in Coffee Cake
Pumpkin is not just a seasonal flavor—it’s the perfect addition to a coffee cake. Not only does it add a rich, warm flavor, but it also infuses the cake with a moist, velvety texture that makes each bite incredibly tender and satisfying. Here’s how pumpkin elevates your coffee cake:
Natural Moisture: Pumpkin puree adds moisture to the batter, which results in a super soft, melt-in-your-mouth crumb. The moisture from the pumpkin helps keep the cake fresh for longer, making it an ideal choice for a make-ahead dessert or breakfast treat.
Earthy Sweetness: Pumpkin has a naturally earthy, mildly sweet flavor that enhances the overall taste of the cake without being overpowering. When paired with warm spices like cinnamon, nutmeg, and ginger, the pumpkin creates a balanced flavor profile that’s comforting and inviting.
Nutritional Boost: Pumpkin is rich in fiber, vitamins like A and C, and antioxidants, making it a more nutritious way to add natural sweetness and moisture to your coffee cake. It’s an excellent way to enjoy the taste of fall without compromising on health.
Pro Tip: Use canned pumpkin puree for consistency, but if you’re using fresh pumpkin, make sure to cook and mash it until smooth to achieve the same texture in your cake.
2. The Spices That Make It Fall-Ready
What truly sets pumpkin spice coffee cake apart is the blend of warm spices that evoke the essence of fall. These spices not only complement the pumpkin but also enhance the richness of the cake’s flavor. Here’s a look at the essential spices:
Cinnamon: A classic fall spice, cinnamon adds a warm, sweet aroma that pairs perfectly with pumpkin. It brings a comforting, cozy quality to the cake, making it feel like the perfect fall treat.
Nutmeg: Nutmeg’s slightly spicy, sweet flavor enhances the pumpkin’s natural flavor. Just a pinch of this aromatic spice can elevate the entire cake with a warming depth.
Ginger: Adding ginger gives the coffee cake a subtle zing that brings a touch of warmth and spice, balancing the richness of the pumpkin and cinnamon.
Cloves: A tiny amount of ground cloves can add a more intense warmth to the mix, complementing the other spices and giving the cake a more complex flavor profile.
Pro Tip: If you don’t have pumpkin pie spice on hand, you can easily make your own by combining cinnamon, nutmeg, ginger, and a hint of cloves to create the perfect fall spice blend.
3. Pumpkin Spice Coffee Cake with Streusel Topping
What’s coffee cake without its signature streusel topping? For pumpkin spice coffee cake, the streusel adds a buttery, sweet contrast to the spiced, moist pumpkin batter, creating the perfect balance of flavors and textures. Here’s how to elevate your streusel topping:
Spiced Streusel: To enhance the pumpkin spice flavors, you can mix a little cinnamon and nutmeg into your streusel topping. This will tie the topping together with the cake, ensuring every bite is as flavorful as the next.
Add Ins: A touch of chopped nuts, such as walnuts or pecans, can add a delightful crunch to the streusel topping. This creates an added texture contrast to the soft, moist cake beneath.
Brown Sugar: Brown sugar in the streusel topping helps give the cake a richer, slightly caramelized flavor, which complements the spices and adds a lovely depth of sweetness to the overall cake.
Pro Tip: Make the streusel topping ahead of time and store it in the fridge to allow the butter to harden, creating larger crumbles. When baked, this results in a crunchier, more textured topping that will contrast beautifully with the soft cake.
4. The Perfect Texture for Pumpkin Spice Coffee Cake
The texture of pumpkin spice coffee cake should be light, moist, and fluffy while still holding together enough to support the streusel topping. Achieving the perfect texture is key to making a memorable cake. Here’s how to ensure your cake is tender and not too dense:
Use Room Temperature Ingredients: For a smoother batter, make sure your eggs, butter, and milk are at room temperature before mixing them. This helps the ingredients emulsify, creating a smooth, consistent batter.
Don’t Overmix: Overmixing the batter can lead to a tough, dense cake. Stir the wet ingredients into the dry ingredients just until they’re combined—this will give the cake a fluffy, tender crumb that will melt in your mouth.
Use a Light Hand with the Flour: To keep the cake from becoming too dense, it’s important to measure your flour properly. Use the spoon-and-level method to avoid packing too much flour into your measuring cup, which can make the cake heavy.
Pro Tip: If you want your coffee cake to have a moist, delicate crumb, try using cake flour instead of all-purpose flour. Cake flour has a lower protein content, which helps produce a tender texture perfect for coffee cakes.
5. When to Serve Pumpkin Spice Coffee Cake
Pumpkin spice coffee cake is the perfect treat for a variety of occasions. Whether you’re serving it at a festive fall gathering or simply enjoying it with your morning coffee, this cake is versatile and always delicious.
For Breakfast or Brunch: Pumpkin spice coffee cake makes an excellent addition to your breakfast or brunch spread. Pair it with a cup of coffee, latte, or apple cider for a cozy fall morning.
Holiday Gatherings: Serve it at Thanksgiving, Halloween, or any holiday gathering as a sweet, spiced dessert that everyone will love. Its autumn flavors make it the perfect treat for the season.
As a Gift: This cake is also great for sharing! It makes a thoughtful homemade gift for friends or family, especially when wrapped in a decorative tin or box.
Pro Tip: To keep your pumpkin spice coffee cake extra fresh, cover it tightly and store it at room temperature for up to three days, or freeze it for up to three months.
Chocolate chip coffee cake
Chocolate chip coffee cake combines the best of both worlds—the rich, tender texture of traditional coffee cake and the indulgent sweetness of chocolate chips. This variation of the classic coffee cake takes your morning treat to the next level by adding an extra layer of flavor and texture that’s sure to please chocolate lovers. Whether you enjoy it with a hot cup of coffee or as an afternoon snack, chocolate chip coffee cake is a true crowd-pleaser.
1. The Allure of Chocolate Chips in Coffee Cake
Chocolate chips add an irresistible richness and sweetness to the coffee cake, making it feel like a dessert rather than just a breakfast treat. Here’s why adding chocolate chips to your coffee cake works so well:
A Sweet Surprise: As you take a bite, the small pockets of melted chocolate offer an extra layer of flavor and unexpected indulgence. The chocolate chips provide a creamy contrast to the light, tender crumb of the cake, making each bite more satisfying.
Texture Contrast: Chocolate chips also introduce a subtle crunch against the soft, spongy texture of the coffee cake. This contrast in textures adds an extra dimension to the cake, making it more exciting to eat.
Perfect Pairing with Coffee: The sweetness of the chocolate chips balances out the slight bitterness of your coffee, making it the perfect match for your morning or afternoon cup of brew.
Pro Tip: To ensure that the chocolate chips don’t sink to the bottom of your batter while baking, toss them in a bit of flour before mixing them into the batter. This will help distribute them evenly throughout the cake.
2. Enhancing the Coffee Cake with Chocolate
To truly make this chocolate chip coffee cake stand out, it’s important to complement the chocolate flavor with other ingredients and techniques that enhance its richness. Here’s how to do it:
Use Semi-Sweet or Milk Chocolate Chips: The type of chocolate you use can affect the overall flavor of your cake. Semi-sweet chocolate chips will provide a balanced sweetness, while milk chocolate chips will add a creamier, sweeter taste.
Add Cocoa Powder: If you want to enhance the chocolate flavor throughout the cake, consider adding a couple of tablespoons of unsweetened cocoa powder to the batter. This will give the cake a deeper, richer chocolate flavor without being overwhelmingly sweet.
Chocolate Marble Effect: For a more striking visual effect, you can swirl in melted chocolate into the batter before baking. This creates a marbled effect that makes the cake look even more indulgent and visually appealing.
Pro Tip: For an extra boost of chocolatey goodness, add a bit of chocolate syrup or chocolate ganache on top of the cake after it cools. It will take the chocolate flavor to the next level.
3. The Sweet Streusel Topping with Chocolate Chips
No coffee cake is complete without a streusel topping, and when you add chocolate chips to this topping, it takes the cake to a whole new level. Here’s how to make a chocolate chip streusel topping:
Combining Chocolate Chips with Streusel: Mix chocolate chips into your streusel along with the classic ingredients—butter, sugar, and cinnamon—to create a slightly crunchy, chocolaty topping that contrasts beautifully with the soft cake underneath.
Use Brown Sugar: Brown sugar in the streusel will enhance the caramel-like sweetness that complements the chocolate chips, adding richness to the flavor. The moisture from the brown sugar also helps create a crumbly yet slightly chewy topping.
Add Nuts: For an extra layer of texture, consider adding chopped nuts like pecans or walnuts to the streusel topping. The nuts provide an additional crunch that complements the softness of the cake and the melt-in-your-mouth chocolate chips.
Pro Tip: If you prefer a more evenly distributed chocolate flavor, sprinkle a few extra chocolate chips on top of the cake just before baking, allowing them to melt into the streusel.
4. Flavor Combinations to Elevate the Cake
Chocolate chip coffee cake is delicious on its own, but there are plenty of ways to mix in other flavors and ingredients that will elevate the cake to new heights. Here are a few ideas:
Vanilla Extract: A teaspoon of vanilla extract will enhance the overall flavor profile of the cake, making it even more aromatic and adding depth to the chocolate flavor.
Espresso Powder: Adding a pinch of espresso powder or instant coffee granules will give the cake a subtle coffee flavor that pairs beautifully with the chocolate chips. The coffee enhances the chocolate, creating a richer, more complex flavor.
Cinnamon: A sprinkle of cinnamon in the batter or streusel topping adds a warm spice that complements the chocolate and gives the cake a comforting, familiar flavor.
Pro Tip: If you’re looking to make the cake even more indulgent, consider filling the center of the cake with a layer of chocolate chips or chocolate ganache. This creates a decadent chocolate-filled surprise when you cut into the cake.
5. When to Serve Chocolate Chip Coffee Cake
Chocolate chip coffee cake is perfect for a variety of occasions, thanks to its versatility and universal appeal. Here’s when you should serve it:
For Breakfast or Brunch: It’s an ideal addition to any brunch spread, especially when paired with a cup of coffee, hot cocoa, or milk. The chocolate chips make it feel like a treat, but the soft, moist crumb keeps it light enough for breakfast.
Holiday Celebrations: Chocolate chip coffee cake can be a showstopper at holiday events like Christmas, Thanksgiving, or Easter. It’s an easy-to-make dessert that adds a festive touch to any gathering.
As a Snack or Dessert: Whether you’re enjoying it as an afternoon snack or serving it as a dessert, this cake is a perfect pick for satisfying a sweet craving. Its indulgence makes it great for special occasions, while still being easy enough for a weekday treat.
Pro Tip: If you have leftovers, you can freeze the coffee cake for later. Just wrap it tightly in plastic wrap and store it in an airtight container, and it will stay fresh for up to 2 months.
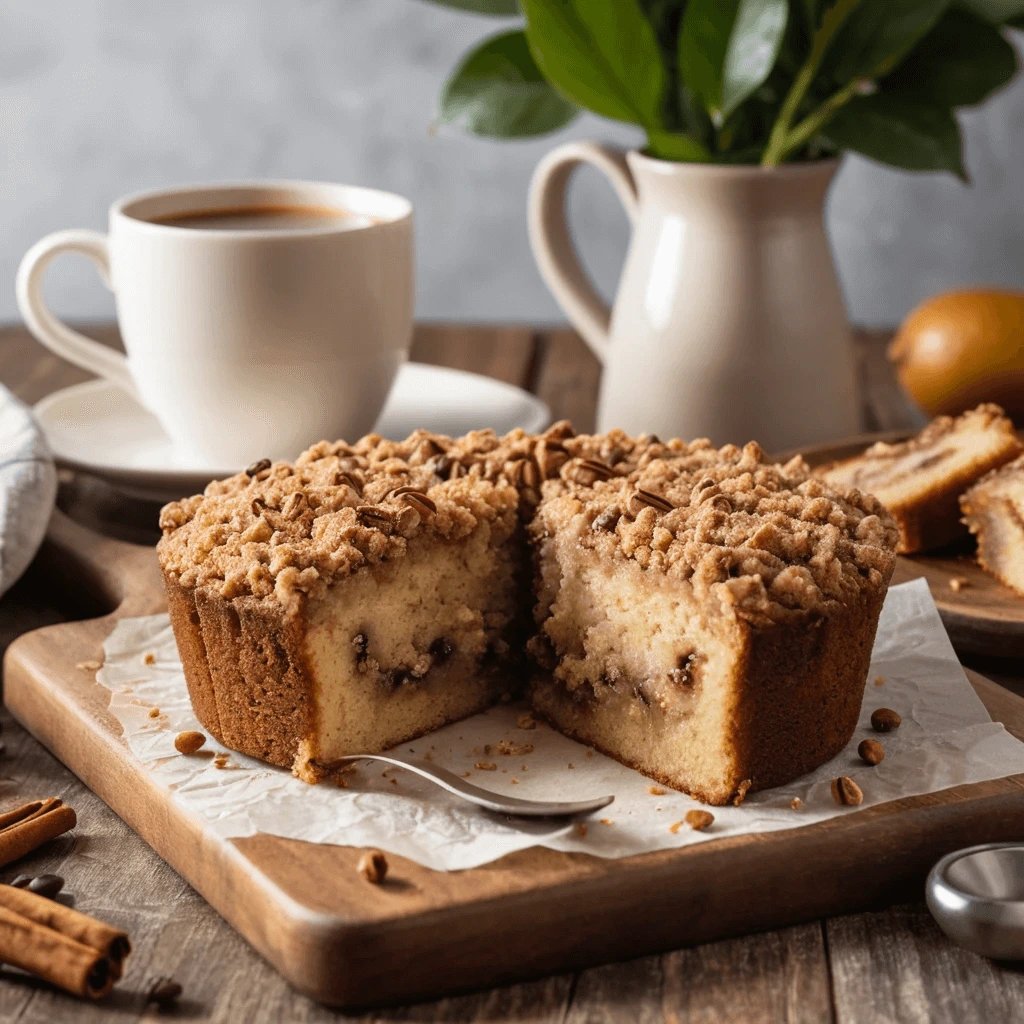
Nutty cinnamon swirl coffee cake
Nutty cinnamon swirl coffee cake is a decadent twist on the classic coffee cake that brings together warm cinnamon, crunchy nuts, and a soft, tender crumb. This variation enhances the traditional flavor profile of a coffee cake by adding an extra dimension with a nutty crunch, making every bite a perfect balance of sweet and savory. The layers of cinnamon swirl and nuts combine to create an irresistible cake that’s ideal for breakfast, brunch, or a comforting dessert.
1. The Allure of Cinnamon and Nuts
The combination of cinnamon and nuts is a match made in heaven. Here’s why they work so well together in a coffee cake:
Cinnamon’s Warmth and Sweetness: The cinnamon creates a warm, spicy undertone that pairs beautifully with the richness of the cake. The sweetness of the cinnamon swirl contrasts perfectly with the subtle savory notes of the nuts, creating a balanced flavor profile.
Crunchy Nuts for Texture: The addition of chopped nuts (such as walnuts, pecans, or almonds) adds a delightful crunch that contrasts with the soft, fluffy texture of the cake. The nuts also bring a roasted, earthy flavor that enhances the overall taste of the coffee cake, giving it a satisfying texture and a bit of complexity.
Perfect Balance of Sweet and Savory: The sweetness of the cinnamon sugar swirl combined with the earthiness of the nuts creates a harmonious balance that makes the coffee cake a treat for the taste buds. The layers of flavor add depth and make each bite more interesting.
Pro Tip: To make the cinnamon swirl even more flavorful, add a dash of nutmeg or clove to the cinnamon-sugar mixture. These spices complement the warmth of the cinnamon and add an extra layer of richness to the cake.
2. How the Swirl Enhances the Flavor
The cinnamon swirl is the heart and soul of this cake. Not only does it make the coffee cake look more visually appealing with its swirled design, but it also infuses the cake with layers of flavor. Here’s how it enhances the coffee cake:
Layered Sweetness: The cinnamon-sugar mixture swirled throughout the batter adds pockets of sweetness in every bite. As the cake bakes, the swirl becomes perfectly integrated into the cake, ensuring that you get a burst of cinnamon flavor with every forkful.
Moist and Tender Texture: The swirl helps lock in moisture as it bakes, ensuring that the cake stays soft and moist. This gives the cake a melt-in-your-mouth texture that’s the perfect contrast to the crunchy nuts and cinnamon flavor.
Visual Appeal: The spiral of cinnamon and sugar winding through the cake creates a beautiful marbled effect, making it visually appealing. This swirl elevates the overall aesthetic of the coffee cake, making it more inviting.
Pro Tip: For an even more decadent swirl, mix some butter into the cinnamon-sugar mixture. This will add richness and ensure that the swirl bakes into a buttery, melt-in-your-mouth ribbon throughout the cake.
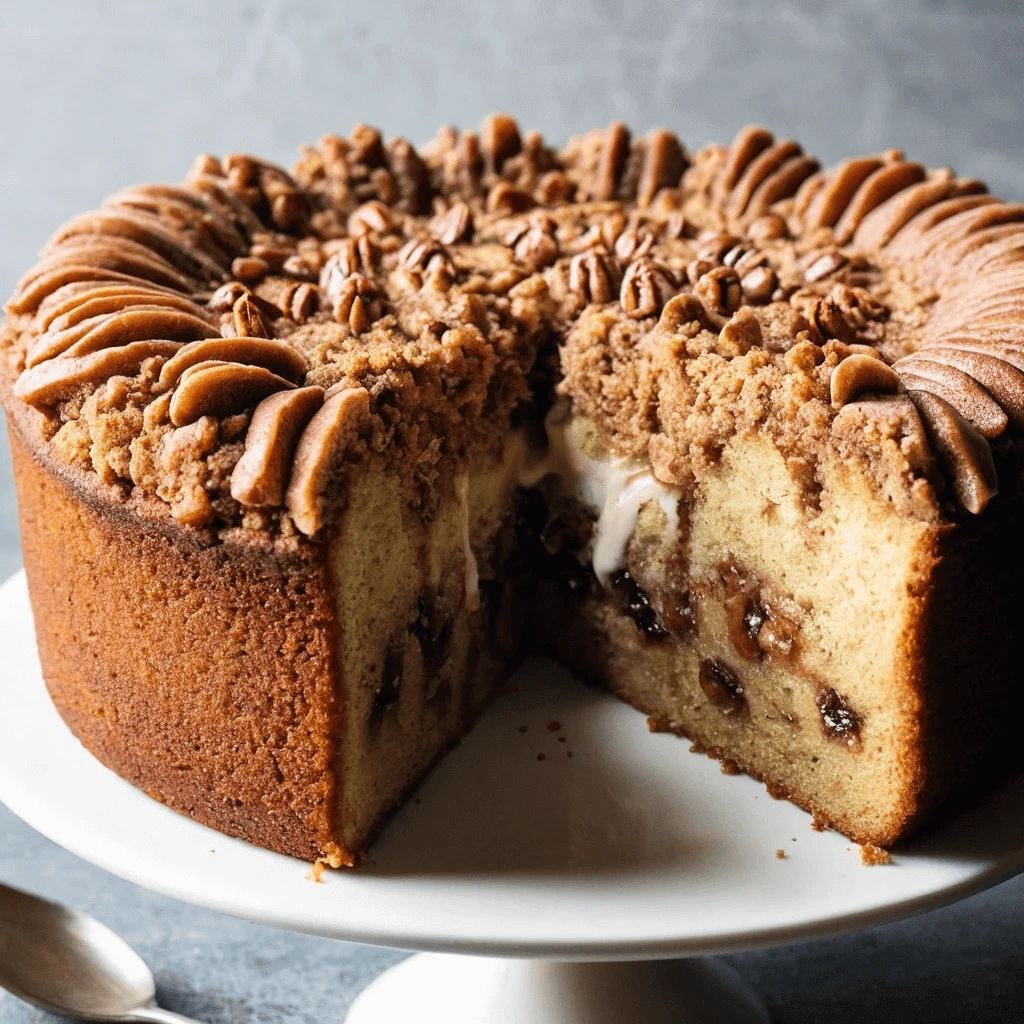
3. The Nutty Crunch of the Topping
The nutty topping is another key element that sets this coffee cake apart from the classic version. The addition of nuts on top of the cake provides both flavor and texture, elevating the cake to a whole new level. Here’s how to make the nutty topping:
Mixing Nuts with Sugar and Cinnamon: The nutty topping is typically made by combining chopped nuts with a bit of sugar and cinnamon, which gets sprinkled over the batter before baking. As it bakes, the nuts become slightly caramelized, providing a crunchy, toasted texture that contrasts with the soft cake.
Use of Brown Sugar: Brown sugar can be used in the topping to add a bit of moisture and richness to the topping. It complements the nuts’ flavor and helps create a slightly sticky, caramelized coating that enhances the overall flavor.
Enhancing the Nutty Flavor: The nuts absorb some of the cinnamon-sugar mixture during baking, which allows the flavor of the cinnamon swirl to meld into the topping. This creates an irresistible crunch with every bite and a flavor-packed experience that’s sure to satisfy.
Pro Tip: Toast the nuts lightly in a skillet before adding them to the topping. This will enhance their flavor and crunchiness, ensuring that they stand out against the soft, fluffy cake.
4. Adding Depth to the Cake with Nutty Flavors
While nuts are often added for their texture, they also contribute a rich flavor that brings a sense of depth to the cake. Here’s how to make the most of nuts in your cinnamon swirl coffee cake:
Selecting the Right Nuts: Walnuts and pecans are the most common choices for nutty coffee cakes, as their earthy flavor complements the sweetness of the cinnamon swirl. You can also experiment with almonds for a slightly milder taste or hazelnuts for a more distinctive flavor.
Roasting Nuts for Extra Flavor: If you want to enhance the nutty flavor, roast the nuts before adding them to the batter or topping. Roasting nuts helps to bring out their natural oils and intensifies their flavor, making them even more delicious when baked into the cake.
Nut Butter Twist: For an even richer nut flavor, consider incorporating a bit of nut butter (like peanut butter or almond butter) into the batter. This adds extra creaminess and nutty depth to the cake, making it even more indulgent.
Pro Tip: If you’re using raw nuts, chop them coarsely to avoid them from becoming too finely crushed in the cake. This ensures they retain their crunch and texture.
5. Perfect Pairings with Nutty Cinnamon Swirl Coffee Cake
Nutty cinnamon swirl coffee cake is delicious on its own, but it also pairs wonderfully with a variety of beverages and additional treats. Here’s how to enjoy this cake to the fullest:
Coffee: The cake’s spiced flavors and cinnamon swirl pair beautifully with a warm cup of coffee. The bitterness of the coffee complements the sweetness of the cake, making it a perfect match for a relaxing morning.
Tea: If you prefer tea, the coffee cake also pairs well with a spicy chai or a cup of Earl Grey. The cinnamon in the cake complements the spices in the tea, creating a warm, cozy experience.
Whipped Cream or Ice Cream: For a more indulgent treat, consider serving the coffee cake with a dollop of whipped cream or a scoop of vanilla ice cream. This adds extra creaminess to the dessert and makes it feel even more luxurious.
Pro Tip: If you have leftovers, this cake makes an excellent afternoon snack or dessert. Just wrap it tightly and store it at room temperature for up to 3 days, or freeze it for longer storage.
Tips for Storing and Serving Your Coffee Cake

How to keep it fresh
One of the best things about coffee cake is how wonderfully fresh and moist it tastes, but keeping it that way after baking can be a bit tricky. Whether you’re enjoying your cake the same day or saving it for later, there are several tips and techniques that can help preserve its flavor, moisture, and texture. Here’s how you can keep your coffee cake fresh:
1. Proper Storage to Retain Freshness
Proper storage is key to ensuring your coffee cake stays as moist and flavorful as when it was first baked. Here’s what to do:
Wrap It Well: After the cake has cooled completely, wrap it tightly in plastic wrap or place it in an airtight container. Wrapping the cake helps prevent air from drying it out and ensures it retains its moisture. If you plan to keep it for more than a day, you might also want to wrap it in aluminum foil to offer an extra layer of protection.
Room Temperature Storage: Coffee cake can usually be stored at room temperature for up to 3 days if it is wrapped properly. Keep it in a cool, dry place, away from direct sunlight or heat, which could cause the cake to dry out.
Refrigeration: If you’re planning to keep your coffee cake longer than three days, store it in the refrigerator. Wrap the cake in plastic wrap and then place it inside an airtight container to prevent it from absorbing other odors in the fridge. While refrigeration can extend freshness, it may cause the cake to lose some of its softness. You can revive the texture by microwaving individual slices for a few seconds.
Pro Tip: For best results, avoid storing coffee cake on a cake stand or under a cake dome, as it doesn’t provide as tight a seal and may allow moisture to escape, leading to a drier cake.
2. Freezing for Long-Term Storage
If you have extra coffee cake and don’t plan to eat it right away, freezing is a great option to preserve its freshness for a longer period. Here’s how to do it:
Cool Before Freezing: Before freezing your coffee cake, let it cool completely. This prevents any condensation from forming inside the wrapping, which can affect the texture.
Wrap It Properly: Wrap the coffee cake tightly in plastic wrap and then cover it with a layer of aluminum foil or place it in a freezer-safe bag. Make sure to remove as much air as possible to prevent freezer burn.
Slice and Freeze: If you prefer to have individual servings ready, consider slicing the coffee cake into portions before freezing. This allows you to thaw only what you need, without having to defrost the entire cake.
Label and Date: Don’t forget to label the cake with the date it was baked before freezing it. Coffee cake can last in the freezer for up to 2-3 months.
Pro Tip: If you’re freezing an entire cake, make sure it’s wrapped in a way that protects the top from any freezer elements, as the icing or crumb topping can get damaged or become freezer-burned. Freezing slices is often a more foolproof option.
3. Reviving the Cake for Freshness
Even after a few days, it’s possible to bring your coffee cake back to life with a few simple tricks:
Microwave for Softness: To bring back the moisture and softness of your coffee cake, microwave individual slices for 10-20 seconds. This will warm up the cake and make it feel like it just came out of the oven, with a fresh and fluffy texture.
Oven Method: If you prefer to heat the whole cake, place it in a preheated oven at 300°F (150°C) for about 10 minutes or until warmed through. Cover the cake loosely with aluminum foil to prevent it from drying out.
Dampen the Cake: If the cake feels particularly dry, place a damp (not soaking) paper towel over the top of the cake before microwaving. The steam will help add moisture and bring back some of its tenderness.
Pro Tip: If your coffee cake has a crumb topping, you might want to add a few extra crumbs on top after reheating to bring back that freshly baked look. You can even add a bit of sugar or cinnamon to recreate that sweet, crunchy topping.
4. Enhancing Freshness with a Simple Glaze
If you notice your coffee cake is beginning to lose its luster or you want to give it a fresh touch before serving, try adding a simple glaze on top:
Quick Glaze: Mix powdered sugar, a few drops of milk, and a splash of vanilla extract to make a simple glaze. Drizzle it over the top of your coffee cake just before serving. The glaze will not only add flavor but also give the cake a fresh, shiny appearance.
Additional Toppings: You can also consider adding a few fresh berries, a dollop of whipped cream, or a dusting of powdered sugar to make the cake look more inviting and fresh, even after a few days of storage.
Pro Tip: When applying the glaze or toppings, do so just before serving rather than when storing the cake. This ensures that the topping stays fresh and doesn’t soak into the cake, keeping the texture intact.
5. Avoiding Dryness from Overbaking
One of the biggest culprits in dried-out coffee cakes is overbaking. Overbaking results in a cake that becomes hard and crumbly, making it difficult to keep fresh. Here’s how to avoid this problem:
Use a Toothpick Test: When baking your coffee cake, always check for doneness by inserting a toothpick into the center of the cake. If it comes out with a few crumbs but not wet batter, your cake is done.
Keep an Eye on the Time: Since every oven is different, it’s important to start checking your cake about 5-10 minutes before the recommended baking time is up. This way, you can prevent overbaking, keeping the cake moist and fresh.
Moisture Retention: Using ingredients like sour cream, buttermilk, or even a little extra butter can help lock in moisture, preventing the cake from drying out during baking. Adding these ingredients ensures that your coffee cake stays moist for a longer period.
Pro Tip: If you find that your cake is getting a little dry as it cools, brush it with a little simple syrup (sugar water) or butter to help reintroduce moisture and keep it soft and tender.
Freezing coffee cake
Freezing coffee cake is an excellent way to preserve its freshness and enjoy it later without sacrificing taste or texture. Whether you’ve baked a large batch or have leftover slices, freezing is a reliable method for long-term storage. Here’s a guide to freezing your coffee cake properly so you can savor it whenever the craving strikes.
1. Cooling Your Cake Before Freezing
Before you freeze your coffee cake, it’s important to allow it to cool completely. Freezing a warm cake can lead to condensation, which creates moisture inside the wrapping. This moisture can affect the cake’s texture when thawed, potentially making it soggy or uneven. Here’s how to go about it:
Let It Cool at Room Temperature: Allow the cake to rest for about 30 minutes to 1 hour at room temperature after baking. This will ensure that the cake is fully cooled down and ready for proper wrapping and freezing.
Avoid Wrapping While Warm: If the cake is still warm when you wrap it, the steam trapped inside can cause frost to form in the freezer, which will turn the cake soggy when thawed. Always let the cake cool down fully before wrapping it for freezing.
2. Proper Wrapping and Protection
Wrapping your coffee cake properly is essential to prevent freezer burn, which occurs when the cake is exposed to air and loses moisture. Here’s how to wrap your cake for optimal freezing:
Wrap Whole Cake or Slices: You can freeze an entire coffee cake or individual slices, depending on your preferences. If freezing slices, wrap them individually to make it easy to defrost only what you need.
Plastic Wrap First: Wrap the cooled coffee cake tightly in plastic wrap. Ensure there are no gaps, as air can quickly dry out your cake. This is the first layer of protection to keep moisture locked in.
Aluminum Foil or Freezer Bags: After wrapping it in plastic wrap, add an additional layer of aluminum foil or place the wrapped cake in a freezer-safe bag. The second layer prevents freezer burn and protects the cake from absorbing any unpleasant odors from other frozen foods.
Vacuum-Seal Option: If you have a vacuum sealer, this is an excellent option to keep your cake tightly sealed and protected from freezer burn. Vacuum-sealing removes air, ensuring the cake stays fresh for a longer period.
Pro Tip: Label the package with the date the cake was baked, so you know when to consume it by. Coffee cake typically stays fresh in the freezer for up to 3 months.
3. Freezing Different Coffee Cake Variations
Certain variations of coffee cake freeze better than others, but with proper wrapping, you can freeze most types. Here are some general guidelines for different types of coffee cakes:
Classic Coffee Cake: Simple and straightforward coffee cake recipes freeze particularly well. Whether it has a crumb topping, cinnamon swirl, or a more traditional flavor, this type of cake will hold up nicely when frozen and reheated.
Coffee Cake with Icing: If your coffee cake has a glaze or icing, freezing it with the icing on top might cause the glaze to harden or crack. Instead, you can freeze the cake without the icing and add the glaze after thawing.
Fruit-Filled Coffee Cake: Cakes with fruit fillings, such as blueberry coffee cake or apple cinnamon coffee cake, freeze well but may have slightly softer textures upon thawing due to the moisture from the fruit. However, they still taste delicious and maintain their flavor when properly wrapped.
Nutty Coffee Cakes: Coffee cakes with nuts or chocolate chips (such as chocolate chip coffee cake) freeze excellently and often taste even better after being frozen, as the flavors have more time to meld together.
4. Thawing Coffee Cake
Once you’re ready to enjoy your frozen coffee cake, proper thawing is essential to maintain its flavor and texture. Here are a few thawing methods:
Thaw at Room Temperature: The best method to thaw your coffee cake is to allow it to defrost at room temperature. Take the cake out of the freezer and let it sit for 2-3 hours (or overnight, depending on the size). This will help it come back to life with a soft and moist texture.
Microwave for Quick Thawing: If you’re in a hurry, you can thaw individual slices of coffee cake in the microwave for about 15-30 seconds. Keep a damp paper towel over the slice to help retain moisture. Be sure to check frequently to avoid overheating.
Oven Method for Whole Cakes: For a whole cake, the oven method works well. Preheat your oven to 300°F (150°C) and place the cake (still wrapped in foil) in the oven for about 10-15 minutes to warm it through. This method will bring out that freshly baked aroma and texture.
Reheat Without Drying Out: If you’re worried about your cake drying out during the thawing process, consider covering it loosely with aluminum foil while reheating it. This will trap moisture and prevent the cake from becoming too dry.
5. How to Revive the Cake After Freezing
Although freezing helps preserve the cake’s taste and texture, there’s a chance that it may lose a bit of its fluffiness and moisture. If this happens, you can use a few tricks to bring it back to its original glory:
Add a Glaze or Frosting: If the cake looks a little dry, you can refresh it by adding a fresh glaze or icing. A simple powdered sugar glaze or a drizzle of cream cheese frosting will revitalize the cake and add moisture.
Reheat with Butter: If you’re reheating the coffee cake, you can brush it with melted butter before placing it in the oven. This will add richness and flavor, helping to restore some of the original moistness.
Serve with Toppings: Freshly cut fruit, whipped cream, or a sprinkle of cinnamon sugar can also help refresh the cake and add a bit of moisture back, while also enhancing the flavor.
Best ways to serve
Serving coffee cake isn’t just about slicing it up and placing it on a plate; it’s about creating an experience that enhances the flavors and texture of the cake, making each bite a moment to savor. Whether you’re serving it at a casual family brunch, an elegant afternoon tea, or as a comforting treat to accompany your coffee, there are plenty of ways to present your coffee cake that will make it even more irresistible. Here’s how to serve it in style:
1. Pair with Beverages for the Ultimate Experience
One of the best ways to elevate your coffee cake is by pairing it with complementary beverages. These drinks will not only enhance the flavor of the cake but also create a well-rounded, satisfying experience.
Coffee and Tea: As the name suggests, coffee cake is traditionally served with coffee, and for good reason! Whether you opt for a dark roast, latte, or cold brew, the rich and bold flavors of coffee create the perfect balance with the sweetness of the cake. Tea is another great choice, particularly black tea or green tea, which adds a mild, slightly astringent note that complements the cake’s richness.
Milk: If you’re serving coffee cake for breakfast or as a treat for kids, a cold glass of milk pairs beautifully with the cake. The creamy, neutral taste of milk cuts through the sweetness and complements the moistness of the cake, balancing out the flavors.
Hot Chocolate: For colder weather or a cozy treat, serve your coffee cake with a cup of indulgent hot chocolate. The chocolatey richness works wonderfully, especially if your coffee cake has chocolate chips or a rich cinnamon swirl.
2. Top with Fresh Fruit and Whipped Cream
While coffee cake is delicious on its own, adding a topping or two can take it to a whole new level of indulgence. Here are some great options:
Fresh Fruit: Add a refreshing touch by topping your coffee cake with fresh seasonal fruit. For example, berries like strawberries, raspberries, and blueberries are a natural match for many flavors of coffee cake, including those with cinnamon or vanilla. You can scatter fruit on top of the cake right before serving, or arrange it neatly on the side for a more polished look. For a fall twist, serve slices of roasted apples or a handful of chopped pears.
Whipped Cream or Whipped Topping: A dollop of freshly whipped cream adds richness and lightness, complementing the cake’s crumbly texture. For an extra treat, consider adding a touch of vanilla or a sprinkle of cinnamon to the whipped cream to enhance the flavor. If you want to make it even more special, top with a small drizzle of caramel sauce or chocolate ganache.
3. Serve as a Dessert or Breakfast
Coffee cake is incredibly versatile and can be enjoyed at different times of the day. Here’s how to serve it depending on the occasion:
For Breakfast or Brunch: Coffee cake is a perfect addition to a brunch spread. Serve it with other breakfast favorites such as scrambled eggs, fresh fruit, and bacon for a balanced and satisfying meal. If you want to make it extra indulgent, pair it with a mimosa or a breakfast cocktail.
For Dessert: If you’re serving coffee cake as a dessert, consider adding a bit of elegance to the presentation. Place the cake on a cake stand or a decorative plate, and garnish with edible flowers or a dusting of powdered sugar. Pair with a scoop of vanilla ice cream or custard for a more decadent treat. A hot fudge sauce or a syrup drizzle can add sweetness and richness to each bite.
4. Try it with Yogurt or Ice Cream
Adding yogurt or ice cream as a topping or side dish to your coffee cake is another fantastic way to serve it. The creamy texture of both can balance the richness of the cake while adding a cool contrast to the warm slices.
Yogurt: A spoonful of Greek yogurt adds a tangy contrast that perfectly complements the sweetness of coffee cake, especially if you’re serving a fruit-topped or nutty variation. It also gives a nice, creamy texture that enhances the flavor profile without overpowering the cake.
Ice Cream: If you want to take your coffee cake to the next level, serve it warm with a scoop of vanilla ice cream or cinnamon ice cream. The warmth of the cake against the cold ice cream creates a wonderful contrast that melts in your mouth, making every bite a treat to remember.
5. Serve with a Creative Twist
Want to get more creative with your coffee cake presentation? Here are a few fun ideas to add flair and impress your guests:
Mini Coffee Cake Servings: Instead of cutting your cake into traditional slices, consider serving individual mini coffee cakes or coffee cake muffins. These bite-sized servings are perfect for a gathering or an afternoon treat and allow guests to enjoy the cake without needing a large slice. Add a sprinkling of powdered sugar on top for a polished look.
Layered Parfait Style: For a modern twist, cut the coffee cake into cubes and layer it with whipped cream, fruit, and chopped nuts in a parfait glass. This layered approach creates a visually appealing dessert that’s as beautiful as it is delicious.
Coffee Cake Crumbles: For a more casual, rustic presentation, break your coffee cake into crumbles and serve them in a large bowl or on a platter. Add a few garnishes, such as fresh fruit or drizzles of syrup, for extra flavor. This is a great option if you want a laid-back yet delicious serving style.
6. Serving Warm or Cold?
Deciding whether to serve your coffee cake warm or at room temperature can make a difference in flavor and texture:
Warm: Many people love the comforting feeling of warm coffee cake, especially when it’s fresh from the oven. A warm slice, paired with a cup of coffee or tea, offers a cozy treat, especially on a chilly morning or afternoon. To serve it warm, gently reheat individual slices or the whole cake in a low-temperature oven or microwave before serving.
Room Temperature: Coffee cake also tastes wonderful at room temperature, especially if you’re making it ahead of time or serving it at a gathering. It maintains its moist texture and will continue to enhance in flavor as it cools, making it perfect for preparing in advance.
How to reheat
Reheating coffee cake properly is essential to maintaining its moist texture, rich flavor, and inviting aroma. Whether you’re enjoying leftovers from a previous day’s breakfast or want to serve a warm slice at your next gathering, knowing the best way to reheat coffee cake ensures it’s just as delicious as when it was freshly baked. Here are some tips and methods to perfectly reheat your coffee cake:
1. Reheating Coffee Cake in the Oven
Using the oven is the best method for preserving the soft and moist texture of the cake while avoiding the possibility of it becoming soggy. Here’s how to do it:
Preheat the Oven: Start by preheating your oven to a low temperature, about 300°F (150°C). This gentle heat helps warm the cake evenly without drying it out.
Cover with Foil: To keep the cake from losing moisture, cover it loosely with aluminum foil. This helps trap steam, which keeps the cake soft and tender during reheating.
Reheat for 10-15 Minutes: Place the cake in the preheated oven and heat for about 10-15 minutes, depending on the size of your cake. For a large whole coffee cake, you may need to let it warm for a little longer. For individual slices, 10 minutes should suffice.
Check for Warmth: After 10 minutes, check if the cake is warmed through by inserting a toothpick into the center. If it comes out warm (not hot), it’s ready. If you want it to be warmer, simply let it heat for a few more minutes.
Optional Finishing Touch: After reheating, you can optionally add a light dusting of powdered sugar or a drizzle of glaze over the top to freshen it up.
2. Reheating Coffee Cake in the Microwave
While the microwave is faster, it can be tricky to get the texture right. The key is to microwave the cake gently, without overcooking it or drying it out. Here’s how:
Slice the Cake: If you have a large coffee cake, cut it into individual slices. This helps ensure even heating without overcooking the edges.
Cover with a Damp Paper Towel: To prevent the cake from drying out, cover the slice with a damp paper towel. This creates steam while microwaving, keeping the cake moist.
Microwave on Low Power: Set the microwave to a lower power setting (about 50% power) and microwave the slice for 15-20 seconds. Check for warmth. If it’s not warm enough, continue to microwave in 10-second intervals until it reaches your desired temperature.
Avoid Overheating: Be careful not to microwave for too long, as it can dry out the coffee cake and affect its texture. The goal is to gently warm it without making it rubbery or tough.
3. Reheating Coffee Cake on the Stovetop (for Individual Slices)
If you’re looking to reheat just a slice of coffee cake quickly without using the oven or microwave, the stovetop can be a great option. It’s especially effective if you want a slightly crispy edge to your slice while keeping the interior moist.
Use a Skillet or Frying Pan: Heat a non-stick skillet over medium-low heat. You don’t need to add any oil or butter; the heat from the pan will be sufficient to warm the cake.
Cover with a Lid: Once the skillet is warm, place the slice of coffee cake in the pan and cover with a lid. The cover will trap the heat, helping to warm the cake evenly and quickly.
Reheat for 3-5 Minutes: Let the cake warm for about 3-5 minutes, flipping it halfway through to ensure it heats evenly on both sides. If you prefer a slightly crispy crust, leave it in the pan for a few extra minutes to achieve the perfect texture.
4. Reheating Coffee Cake in the Air Fryer
An air fryer can be another convenient option for reheating coffee cake, especially if you want a crispy outer layer. Here’s how to do it:
Preheat the Air Fryer: Preheat your air fryer to 300°F (150°C), similar to how you would use an oven.
Place Cake in Air Fryer Basket: Place your coffee cake slice in the basket, ensuring there’s enough space around it for air to circulate. If you’re reheating a large piece of cake, cut it into smaller portions for more even reheating.
Reheat for 4-6 Minutes: Heat the cake for about 4-6 minutes, checking after the first few minutes to make sure it’s not overcooking. You can flip the slice halfway through if you want a more even crisp on both sides.
5. Adding a Touch of Freshness After Reheating
After reheating, you might notice the cake loses a bit of its freshly baked flavor. To counteract this, you can add some finishing touches to give it a boost:
Sprinkle with Powdered Sugar: A light dusting of powdered sugar can bring back some sweetness and give the cake a fresh, appealing look.
Add a Glaze or Icing: A simple glaze made with powdered sugar and a splash of milk or cream can reinvigorate the flavor of the coffee cake. Drizzle it over the top for a touch of sweetness and moisture.
Serve with Toppings: Top your reheated coffee cake with fresh fruit, whipped cream, or a scoop of vanilla ice cream for an extra indulgent touch.
6. How to Keep Coffee Cake Fresh for Reheating
The key to successful reheating is proper storage. To ensure your coffee cake stays fresh until you’re ready to reheat it, follow these storage tips:
Wrap Properly: Wrap your coffee cake tightly in plastic wrap or store it in an airtight container to prevent it from drying out.
Refrigerate if Storing for Longer Periods: If you’re planning to keep the cake for several days, store it in the refrigerator. However, note that it might dry out faster than when kept at room temperature.
Freeze for Longer Storage: If you need to store the cake for more than a week, freezing it is your best option. Be sure to wrap the cake tightly in plastic wrap and place it in a freezer-safe bag or container. When you’re ready to reheat, allow it to thaw in the fridge overnight before reheating using one of the methods above.
Coffee cake is more than just a delicious dessert; it’s a comforting tradition that brings warmth and joy to any occasion. Whether enjoyed with family over breakfast, shared with friends at a gathering, or savored as a quiet afternoon treat, its soft, moist texture and delightful flavors make it a timeless favorite. From classic cinnamon to creative variations like blueberry or pumpkin spice, the possibilities are endless when it comes to personalizing this beloved cake.