
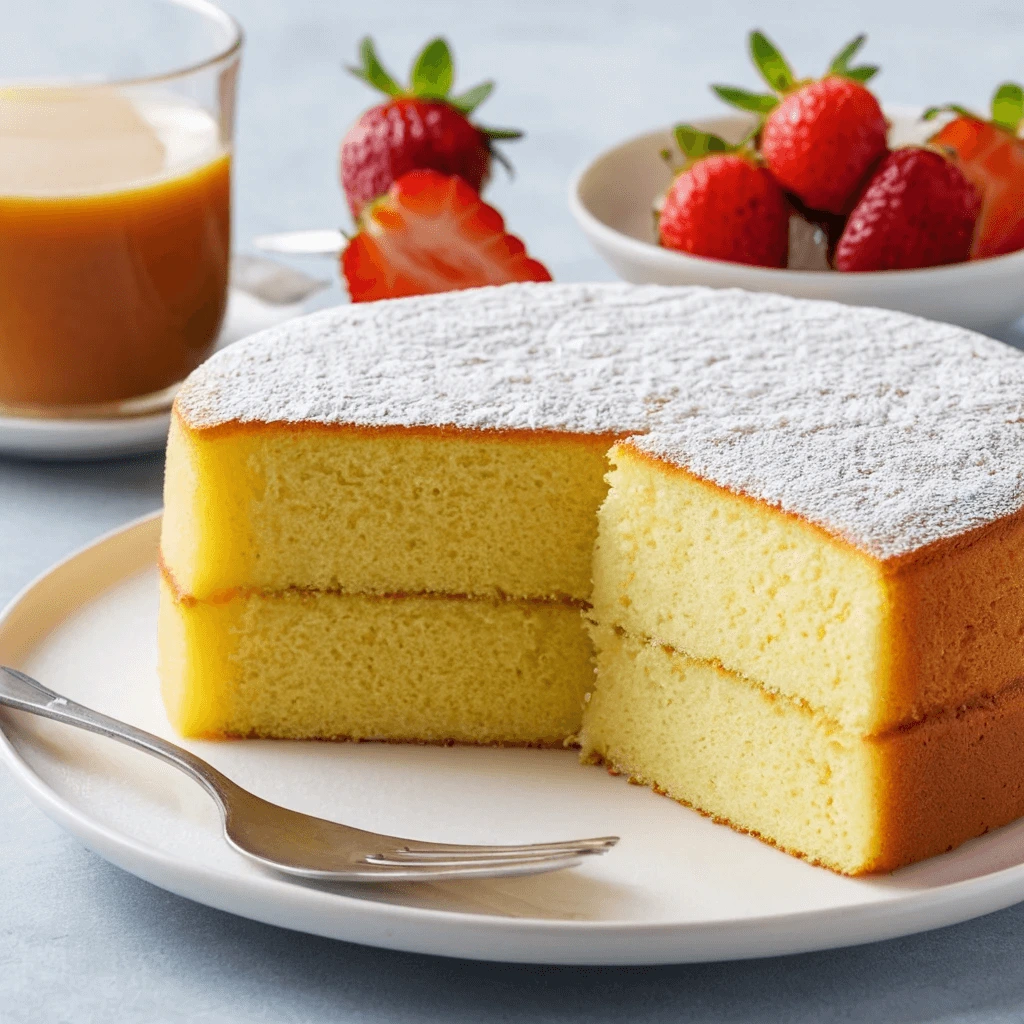
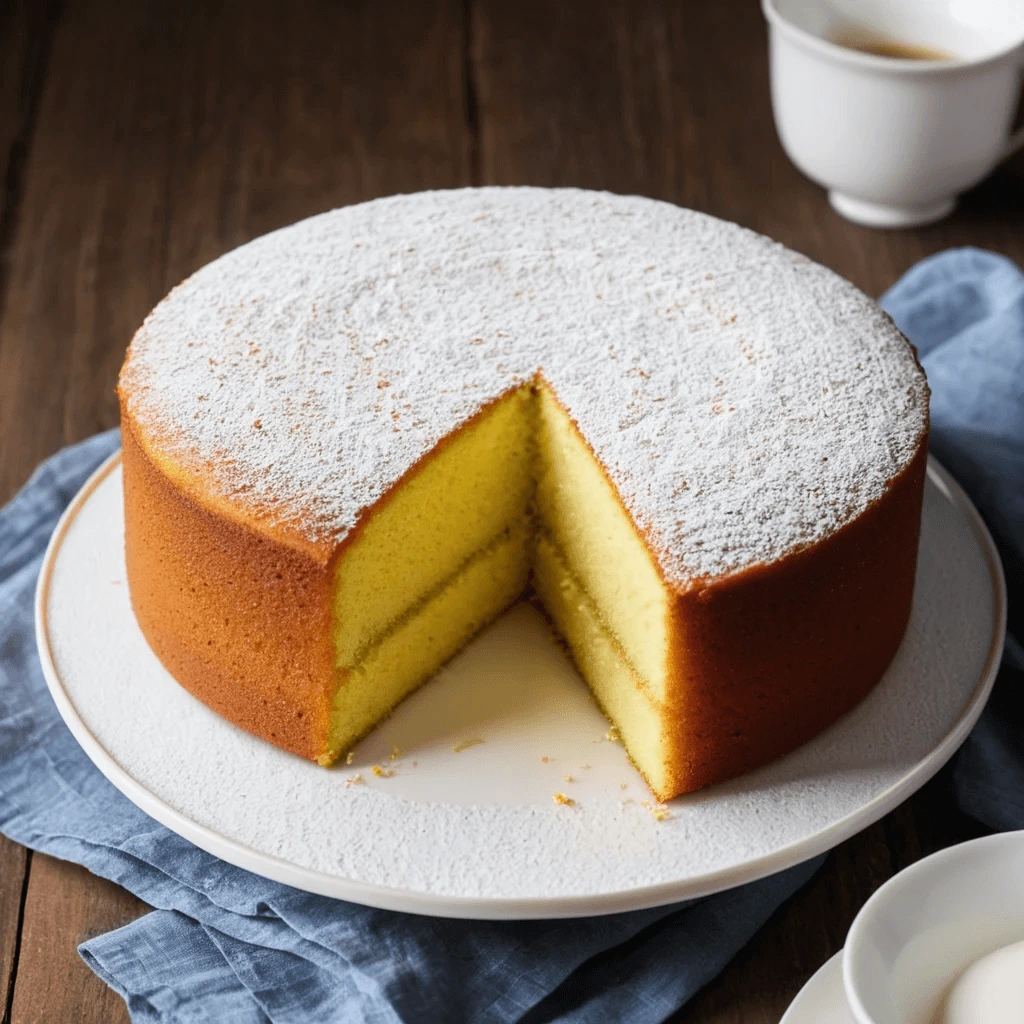
Light, airy, and irresistibly soft, sponge cake is a timeless classic that has won hearts across the world. With its delicate texture and subtle sweetness, this versatile cake serves as the perfect base for countless desserts, from layered cakes with rich fillings to simple tea-time treats. Whether you prefer it plain, dusted with powdered sugar, or dressed up with whipped cream and fresh fruits, sponge cake offers endless possibilities for creativity in the kitchen. In this guide, we’ll explore everything you need to know to bake the perfect sponge cake—from essential ingredients and techniques to expert tips that ensure a flawless result every time.
What Makes a Sponge Cake Perfect?
Understanding the texture
The texture of a sponge cake is what sets it apart from other types of cakes. Unlike dense or overly rich cakes, a perfect sponge cake should be light, airy, and moist—delivering a delicate and soft bite that melts in your mouth. Achieving this ideal texture requires a combination of the right ingredients, proper techniques, and precise baking conditions. Let’s break down the key elements that contribute to this irresistible texture.
1. Lightness: The Secret to a Delicate Sponge Cake
A great sponge cake is all about lightness, which comes from incorporating air into the batter. This airiness is primarily achieved by:
- Beating eggs properly: Eggs, especially the whites, play a crucial role in aeration. When beaten to stiff peaks, they create a structure that helps trap air, giving the cake its signature fluffy texture.
- Sifting dry ingredients: Flour, baking powder, and other dry ingredients should be sifted to remove lumps and introduce air, which results in a finer, softer crumb.
- Gentle folding technique: When combining wet and dry ingredients, it’s essential to fold the mixture gently to prevent air bubbles from escaping. Overmixing can deflate the batter and result in a dense cake.
2. Airiness: Achieving the Perfect Rise
For a sponge cake to rise beautifully, it relies on the air trapped within the batter expanding in the oven. Here’s how to ensure a perfectly airy sponge:
- Using the right leavening agents: While some sponge cakes rely solely on whipped eggs for lift, others may include a small amount of baking powder to ensure a consistent rise.
- Oven temperature control: Baking at the right temperature (usually around 325–350°F or 160–180°C) allows the cake to rise evenly. Too high a temperature can cause the cake to rise too quickly and collapse, while too low a temperature may lead to a dense texture.
- Avoiding excessive grease: Using parchment paper instead of heavily greasing the cake pan allows the batter to “grip” the sides, aiding in a better rise.
3. Moisture: The Key to a Soft and Tender Cake
A dry sponge cake can ruin the experience, so maintaining the right level of moisture is essential. Here’s how to keep your sponge cake soft and moist:
- Choosing the right flour: Cake flour has a lower protein content than all-purpose flour, resulting in a softer texture.
- Adding the right amount of fat and liquid: Some sponge cakes use butter, while others rely on oil or even whole milk to maintain moisture. Too little fat can lead to a dry cake, while too much can make it greasy.
- Not overbaking: Overbaking is one of the most common reasons for a dry sponge cake. Always check for doneness using a toothpick—if it comes out clean or with a few moist crumbs, your cake is ready.
- Cooling properly: Allowing the cake to cool gradually at room temperature prevents it from drying out. Covering the cake lightly with a clean kitchen towel can help retain moisture.
Key ingredients for a perfect sponge cake
A perfect sponge cake is a delicate balance of simple ingredients that work together to create a light, airy, and moist texture. Each ingredient plays a crucial role in the final outcome, from structure and flavor to moisture and tenderness. Understanding the purpose of these ingredients will help you achieve consistent results and troubleshoot any issues that arise during baking. Let’s take a closer look at the key components that make up a flawless sponge cake.
1. Eggs – The Foundation of a Sponge Cake
Eggs are the backbone of a sponge cake, providing structure, stability, and aeration. Unlike butter cakes that rely on fat for richness, sponge cakes use eggs to create their signature light and fluffy texture.
- Whole Eggs: Many sponge cake recipes use whole eggs, which contribute to both structure and moisture. Beating the eggs with sugar until pale and fluffy helps incorporate air, giving the cake a soft and airy texture.
- Egg Whites: In some recipes, egg whites are separated and whipped to stiff peaks before being folded into the batter. This technique adds extra volume and helps create a beautifully delicate crumb.
- Egg Yolks: Yolks add richness and contribute to the cake’s moisture and tenderness. Some sponge cakes use extra yolks for a softer, more velvety texture.
Pro Tip: Always use room-temperature eggs for better aeration and even mixing. Cold eggs don’t whip as well and may result in a denser cake.
2. Sugar – Sweetness and Structure
Sugar does more than just sweeten the sponge cake—it plays a crucial role in aeration, moisture retention, and crust formation.
- Granulated Sugar: This is the most commonly used sugar in sponge cakes. Beating sugar with eggs helps create a stable foam, which traps air and gives the cake its characteristic fluffiness.
- Powdered Sugar: Sometimes used for dusting or in variations like genoise sponge, it dissolves more quickly into the batter for a finer crumb.
- Caster Sugar (Superfine Sugar): A great choice for sponge cakes, as its small crystals dissolve easily into the batter, leading to a smoother texture.
Pro Tip: Gradually add sugar when whipping eggs to ensure proper aeration and avoid deflating the mixture.
3. Flour – The Structural Base
The type of flour you use greatly impacts the texture of your sponge cake.
- Cake Flour: This is the best choice for sponge cakes because of its low protein content (about 7-9%), which results in a tender and delicate crumb.
- All-Purpose Flour: While it can be used, it has a higher protein content, which may lead to a slightly denser texture. To make cake flour at home, remove 2 tablespoons of all-purpose flour per cup and replace it with cornstarch.
- Sifting Flour: Always sift the flour before adding it to the batter to aerate it and prevent clumping. This ensures an even, lump-free mix that contributes to a lighter cake.
Pro Tip: Fold the flour gently into the batter to avoid deflating the air bubbles that create the cake’s airy texture.
4. Fat – Adding Moisture and Tenderness
While sponge cakes are naturally light, a little fat helps maintain a moist and tender crumb.
- Butter: Some sponge cake recipes include melted butter for richness and a buttery flavor without compromising the cake’s lightness.
- Oil: In certain recipes, vegetable or canola oil is used instead of butter for extra moisture, resulting in a softer cake.
- Milk or Cream: Some variations of sponge cake include a splash of milk or cream to enhance tenderness and add a subtle richness.
Pro Tip: If using butter, melt it and allow it to cool slightly before adding it to the batter to prevent deflating the whipped eggs.
5. Leavening Agents – Helping the Cake Rise
Some sponge cakes rely solely on whipped eggs for lift, but others may include additional leavening agents for a more reliable rise.
- Baking Powder: A small amount is sometimes added to ensure a good rise and prevent the cake from being too dense.
- Baking Soda: Not commonly used in traditional sponge cakes but may appear in recipes that contain acidic ingredients like buttermilk or lemon juice.
Pro Tip: If your recipe includes baking powder, make sure it’s fresh and not expired, as old leavening agents won’t work properly.
6. Flavor Enhancers – Elevating the Taste
To make your sponge cake extra delicious, consider adding flavor enhancers that complement its light and airy texture.
- Vanilla Extract: A classic addition that enhances the overall taste and balances the sweetness.
- Lemon Zest or Orange Zest: Adds a fresh, citrusy aroma and brightens the flavor.
- Cocoa Powder: For a chocolate sponge cake variation, replace a small amount of flour with unsweetened cocoa powder.
- Spices: A pinch of cinnamon, nutmeg, or cardamom can add warmth and depth to the cake.
Pro Tip: Always use pure vanilla extract instead of artificial flavoring for the best taste.
7. Liquid Ingredients – Maintaining the Right Consistency
Though many sponge cakes rely on whipped eggs for moisture, some recipes include small amounts of liquid to improve the texture.
- Water: Some classic sponge cake recipes call for hot water to help dissolve sugar and create a smoother batter.
- Milk: Adds a bit of creaminess and softens the cake’s texture.
- Lemon Juice or Vinegar: Sometimes added in small amounts to help stabilize whipped egg whites and enhance rise.
Pro Tip: If using a liquid ingredient, be sure to add it gradually and incorporate it gently to maintain the batter’s lightness.
The role of baking techniques
While high-quality ingredients are essential for baking a perfect sponge cake, baking techniques play an equally crucial role. The way you mix, fold, and bake your ingredients determines the final texture, rise, and overall success of your cake. Even the slightest misstep—like overmixing or incorrect oven temperature—can lead to a dense or dry sponge cake.
Let’s explore the key baking techniques that contribute to a light, airy, and moist sponge cake.
1. The Importance of Proper Egg Beating
One of the defining characteristics of a sponge cake is its delicate and airy texture, which comes from incorporating air into the batter. This is primarily achieved by whipping eggs and sugar to create a stable structure.
- Whole Egg Beating Method: In many sponge cake recipes, whole eggs are beaten with sugar until they become thick, pale, and fluffy. This process, known as the “ribbon stage,” helps trap air, giving the cake its volume.
- Separated Egg Method: In some recipes, egg yolks and egg whites are beaten separately. The egg whites are whipped to stiff peaks and folded into the batter at the end, providing extra lift and a finer crumb.
Pro Tip: To achieve maximum aeration, always use room-temperature eggs and beat them for at least 5-7 minutes until the mixture doubles in volume.
2. Gentle Folding – Preserving Air Bubbles
Once you’ve aerated the batter, you need to handle it gently to maintain the trapped air. This is where the folding technique becomes critical.
- Why Folding Matters: Overmixing the batter can deflate the air bubbles, resulting in a dense sponge. Instead of stirring, use a spatula to gently fold the flour or egg whites into the batter.
- How to Fold Correctly: Use a large rubber spatula and make sweeping motions from the bottom of the bowl, lifting the batter up and over until fully combined.
Pro Tip: Rotate the bowl as you fold to ensure even mixing without deflating the air pockets.
3. Sifting the Dry Ingredients – Ensuring a Light and Even Batter
Flour plays a crucial role in giving structure to the cake, but if not handled correctly, it can weigh down the batter. Sifting the flour before adding it to the mixture helps prevent clumping and creates a lighter, more even texture.
- Sifting Aerates the Flour: This allows it to incorporate more easily into the batter without forming lumps.
- Prevents Overmixing: Since well-sifted flour blends smoothly, it minimizes the need for excessive mixing, preserving the cake’s delicate structure.
Pro Tip: If your recipe includes baking powder or cocoa powder, sift them together with the flour for even distribution.
4. Controlling Oven Temperature – Even Baking and Rise
The way a sponge cake bakes is just as important as how it’s mixed. Oven temperature affects how well the cake rises and develops its soft texture.
- Preheating the Oven: Always preheat the oven for at least 10-15 minutes before baking. An unevenly heated oven can cause the cake to rise inconsistently.
- Proper Temperature Setting: A moderate oven temperature (325–350°F / 160–180°C) is ideal. Too high, and the cake may dome or crack; too low, and it may collapse or turn dense.
- Avoid Opening the Oven Door Too Early: This can cause the cake to sink due to sudden temperature changes. Wait until the last few minutes of baking before checking for doneness.
Pro Tip: Use an oven thermometer to ensure accurate temperature, as some ovens run hotter or colder than the dial indicates.
5. Using the Right Cake Pan – Achieving the Perfect Bake
The type and size of the cake pan can affect how well the sponge cake bakes.
- Material Matters: Aluminum cake pans conduct heat evenly, producing a uniform bake. Avoid dark-colored or glass pans, as they can cause uneven browning.
- Pan Size: Using the correct pan size ensures even baking. A pan that’s too small may cause the batter to overflow, while one that’s too large can result in a thin, dry cake.
- Lining the Pan Correctly: Greasing and lining the pan with parchment paper prevents the cake from sticking and helps it release easily after baking.
Pro Tip: If using a tube pan or springform pan, make sure it’s properly greased, as sponge cakes tend to be delicate.
6. Testing for Doneness – Knowing When It’s Ready
A perfectly baked sponge cake should be golden brown, slightly springy to the touch, and fully set in the center. There are a few ways to check for doneness:
- Toothpick Test: Insert a toothpick into the center—if it comes out clean or with a few dry crumbs, the cake is done.
- Spring Test: Gently press the center of the cake with your finger—if it springs back without leaving an indentation, it’s ready.
- Visual Cues: The edges should slightly pull away from the sides of the pan, and the top should have a light golden color.
Pro Tip: If the cake is browning too quickly but still undercooked in the center, cover it loosely with foil for the remaining bake time.
7. Cooling and Unmolding – Preserving the Cake’s Structure
Proper cooling is just as important as baking. If handled incorrectly, a sponge cake can collapse or lose its delicate texture.
- Cool in the Pan for 5-10 Minutes: Letting the cake sit briefly helps it set before removal.
- Transfer to a Wire Rack: After a few minutes, carefully remove the cake from the pan and place it on a cooling rack to prevent sogginess.
- Avoid Drastic Temperature Changes: Never place a hot cake in a cold area, as rapid cooling can cause it to shrink.
Pro Tip: If making a genoise or chiffon sponge, invert the pan while cooling to prevent collapse.
The importance of baking time and temperature
Baking time and temperature play a critical role in achieving the ideal sponge cake texture—light, airy, and moist. Even if you use the best ingredients and techniques, incorrect baking temperature or timing can result in a collapsed, dry, dense, or unevenly baked cake. Understanding how time and temperature work together ensures a perfectly risen sponge cake with a delicate crumb and golden exterior.
Let’s dive deeper into why these factors matter and how to get them right.
1. How Baking Temperature Affects Your Sponge Cake
The temperature at which you bake your sponge cake directly influences its rise, texture, and overall success. Here’s why:
- Too High Temperature (Above 375°F / 190°C)
- The outside of the cake browns too quickly while the inside remains undercooked.
- The cake may rise too fast and then collapse due to an unstable structure.
- Overbaking at high heat results in a dry and dense sponge cake.
- Too Low Temperature (Below 320°F / 160°C)
- The cake may not rise properly, leading to a flat, dense, or gummy texture.
- A low temperature means the structure doesn’t set properly, making the cake fragile.
- It may take too long to bake, which can lead to a dry cake due to prolonged exposure to heat.
- The Ideal Temperature (Between 325°F – 350°F / 160°C – 180°C)
- This ensures a steady rise, allowing the cake to develop a delicate and airy crumb.
- The heat penetrates evenly, resulting in a moist interior and a golden, slightly crisp exterior.
- The sponge sets properly without collapsing.
Pro Tip: Always preheat your oven for at least 10-15 minutes to ensure consistent baking temperature. Using an oven thermometer can help confirm accuracy, as some ovens run hotter or cooler than their settings indicate.
2. Understanding the Role of Baking Time
Just as important as temperature, baking time ensures that the cake is cooked through without drying out. Here’s how improper timing affects the cake:
- Underbaking (Removing Too Soon)
- The cake remains wet, dense, or gummy in the center.
- A weak structure can cause the cake to sink after cooling.
- Raw batter at the center indicates it needs more time in the oven.
- Overbaking (Leaving It in Too Long)
- The cake loses moisture, becoming dry, crumbly, and tough.
- Overcooked sponge cakes can develop a hard crust on the edges.
- The color may turn too dark or burnt instead of a light golden brown.
- The Perfect Bake Time
- Sponge cakes typically take 25-35 minutes to bake at 325°F – 350°F (160°C – 180°C).
- The exact time depends on the size of the pan, your oven, and recipe variations.
- It’s best to check the cake a few minutes before the suggested baking time to prevent overbaking.
Pro Tip: Always set a timer to avoid accidentally overbaking your cake.
3. How to Check If Your Sponge Cake Is Done
To ensure your sponge cake is perfectly baked, use one or more of these methods:
- Toothpick Test: Insert a toothpick into the center of the cake. If it comes out clean or with a few dry crumbs, the cake is done. If wet batter sticks to it, bake for a few more minutes.
- Spring-Back Test: Gently press the top of the cake with your finger. If it springs back, it’s fully baked. If an indentation remains, it needs more time.
- Edge Separation: A fully baked sponge cake will start to pull away slightly from the edges of the pan.
- Visual Check: The cake should have an even golden-brown color, without being too pale or too dark.
Pro Tip: If the cake is browning too quickly but still undercooked in the center, loosely cover it with aluminum foil for the remaining bake time.
4. Factors That Can Affect Baking Time and Temperature
Even if you follow a recipe precisely, different conditions can affect how your sponge cake bakes. Here are some key factors to consider:
a) Oven Type and Accuracy
- Conventional ovens tend to bake evenly, while fan-forced (convection) ovens bake faster due to circulated hot air.
- Always adjust the temperature by 25°F (15°C) lower if using a convection oven.
- Invest in an oven thermometer to ensure accurate heat settings.
b) Cake Pan Material and Size
- Metal pans conduct heat well, leading to even baking, while glass or ceramic pans may require a longer bake time.
- Smaller or deeper cake pans take longer to bake, while shallow pans bake faster.
c) Ingredients at the Right Temperature
- Cold eggs or butter can affect batter aeration, delaying the baking process.
- Room-temperature ingredients mix better and ensure even baking.
d) Altitude and Humidity
- High altitudes reduce air pressure, causing cakes to rise and fall more quickly. Adjustments in temperature and ingredients may be needed.
- High humidity can affect flour moisture levels, sometimes requiring slight adjustments in baking time.
Pro Tip: If your cake is slightly overbaked and dry, brushing it with simple syrup (sugar + water mixture) can restore some moisture.
Essential Tips for Baking a Fluffy and Light Sponge Cake
For more expert tips on baking and perfecting your sponge cake, check out this detailed guide on mastering cake baking techniques from renowned pastry chefs. It covers everything from ingredient selection to advanced baking methods.
Properly preparing your ingredients
A perfectly baked sponge cake starts long before it goes into the oven—it begins with properly preparing your ingredients. Even if you follow the best techniques, using incorrectly prepared ingredients can lead to a dense, dry, or unevenly baked cake. Understanding the role of each ingredient and how to prepare them correctly ensures your sponge cake turns out light, airy, and moist every time.
Let’s break down the essential steps for properly prepping your ingredients before you start baking.
1. The Importance of Room-Temperature Ingredients
One of the most crucial steps in baking a successful sponge cake is ensuring that key ingredients—eggs, butter, and milk (if used)—are at room temperature before mixing.
Why Room Temperature Matters
- Room-temperature ingredients blend more evenly, preventing lumps or curdling in the batter.
- Cold eggs or butter can cause the batter to separate, leading to an uneven cake texture.
- Warmer ingredients help trap air better, which is key for a light and airy sponge.
How to Bring Ingredients to Room Temperature Quickly
- Eggs: Place cold eggs in a bowl of warm (not hot) water for 5–10 minutes.
- Butter: Cut butter into small cubes and let it sit at room temperature for 15–20 minutes or microwave it in 5-second bursts (be careful not to melt it).
- Milk or Other Liquids: Microwave for 10–15 seconds to remove the chill.
Pro Tip: If your butter is too soft or greasy, it can make the cake dense and heavy. It should be soft but still hold its shape when pressed.
2. Measuring Ingredients Accurately
Baking is a science, and even small measurement errors can impact the final result. To achieve the perfect sponge cake texture, it’s important to measure ingredients precisely using the right techniques.
How to Measure Key Ingredients Correctly
- Flour: Spoon flour into a measuring cup and level it off with a flat edge (avoid scooping directly from the bag, as it compacts the flour, leading to too much).
- Sugar: Granulated sugar can be measured directly using a cup, but brown sugar should be packed firmly into the measuring cup.
- Butter: Use a kitchen scale for the most accuracy, as butter sticks can vary in size and weight.
- Liquid Ingredients: Always check measurements at eye level when using a liquid measuring cup.
Pro Tip: If you bake frequently, investing in a digital kitchen scale ensures precise and consistent measurements, especially for flour and sugar.
3. Sifting Dry Ingredients for a Lighter Cake
Sifting may seem like an unnecessary extra step, but it plays a huge role in achieving a light and airy sponge cake.
Why Sifting Is Important
- Breaks up clumps in flour, baking powder, or cocoa powder.
- Aerates the dry ingredients, making the batter lighter.
- Ensures even distribution of leavening agents (like baking powder or baking soda).
How to Properly Sift Ingredients
- Place a fine-mesh sifter or sieve over a large mixing bowl.
- Add flour, baking powder, and salt (or other dry ingredients).
- Gently shake or tap the sifter to let the ingredients pass through.
- Repeat the process if necessary for extra-light results.
Pro Tip: If you don’t have a sifter, whisking the dry ingredients together vigorously with a fork or wire whisk can achieve similar results.
4. Properly Separating and Beating Eggs
Eggs play a crucial role in sponge cakes, helping to create structure, moisture, and fluffiness. However, they must be handled correctly for the best results.
How to Separate Eggs Without Breaking the Yolks
- Crack the egg into a small bowl (instead of directly into your batter).
- Carefully transfer the yolk back and forth between the shell halves, letting the egg white fall into a separate bowl.
- If any yolk gets into the whites, remove it with a clean spoon—fat from the yolk can prevent the whites from whipping properly.
How to Beat Eggs for Maximum Volume
- If the recipe calls for whipped egg whites, make sure the bowl and whisk are grease-free. Even a little oil or egg yolk can prevent the whites from forming stiff peaks.
- For whole eggs, beat them with sugar until the mixture becomes pale, thick, and fluffy—this helps incorporate air, making the sponge cake lighter.
- Use a stand mixer or hand mixer on medium-high speed to achieve the right consistency.
Pro Tip: Adding a pinch of salt or a few drops of lemon juice to egg whites helps stabilize them for better whipping.
5. Preparing the Cake Pan Properly
Even if your batter is perfect, not preparing your cake pan correctly can lead to sticking, uneven baking, or difficulty in removing the cake.
Steps to Properly Prepare a Cake Pan
- Grease the pan lightly with butter or non-stick spray.
- Line the bottom with parchment paper to prevent sticking.
- If using a tube pan or bundt pan, dust it with flour after greasing for extra protection.
Pro Tip: Avoid using too much butter or oil, as it can cause the edges to become overly crispy or greasy. A light, even layer is all you need.
6. Preparing Ingredients in Advance for a Smooth Baking Process
A well-organized baking setup, also known as mise en place, can help you bake efficiently and stress-free.
How to Stay Organized Before Baking
Measure all ingredients before starting—this prevents mistakes and ensures a smooth process.
Preheat the oven in advance (sponge cakes need consistent heat from the start).
Gather all tools (mixing bowls, spatula, sifter, electric mixer, etc.) for easy access.
Pro Tip: If making multiple sponge cake layers, weigh out the batter evenly before baking to ensure uniform cake layers.
Beating the eggs to the right consistency
Eggs are one of the most crucial ingredients in a sponge cake, providing structure, stability, and volume. Unlike dense cakes that rely on butter or oil, sponge cakes get much of their signature light and airy texture from properly beaten eggs. However, achieving the right consistency is key—over- or under-beating can lead to a flat, dense, or dry cake.
In this section, we’ll explore:
Why properly beaten eggs are essential for sponge cake
The different stages of beating eggs and their role
Common mistakes to avoid when beating eggs
1. Why Beating Eggs Properly Matters in a Sponge Cake
Beating eggs correctly is the foundation of a great sponge cake because it helps:
- Incorporate air into the batter, creating a light and fluffy texture.
- Stabilize the cake structure by forming a strong protein network.
- Emulsify fats and liquids for a smooth and even batter.
- Prevent deflation during baking, ensuring the cake rises properly.
Pro Tip: The goal of beating eggs for a sponge cake is to introduce tiny air bubbles into the mixture, which will expand during baking and create a soft, airy crumb.
2. Beating Whole Eggs vs. Separating Yolks and Whites
There are two common methods for preparing eggs in a sponge cake:
Method 1: Beating Whole Eggs with Sugar (Classic Sponge Cake)
- This technique is commonly used in Genoise and Victoria sponge cakes.
- Whole eggs are beaten together with sugar until the mixture becomes pale, thick, and airy.
- The sugar helps stabilize the egg foam, preventing it from deflating too quickly.
How to Beat Whole Eggs Properly:
- Use room-temperature eggs—they whip up faster and hold more air.
- Beat on medium-high speed using an electric mixer until the mixture triples in volume and falls in thick ribbons when lifted.
- This process usually takes 5–8 minutes depending on your mixer.
Method 2: Separating Yolks and Whites (Lighter, Fluffier Texture)
- Used in Chiffon or Angel Food Cakes, this method whips egg whites separately to maximize air incorporation.
- The yolks are typically beaten with sugar separately, while the whites are whipped to form soft or stiff peaks.
- The beaten egg whites are gently folded into the batter to maintain the air bubbles.
How to Beat Egg Whites Properly:
- Use a clean, grease-free bowl and beaters—even a tiny amount of fat or egg yolk can prevent whites from whipping.
- Start beating on low speed, then gradually increase to medium-high speed.
- Add a small amount of acid (like lemon juice or cream of tartar) to help stabilize the foam.
- Continue whipping until the whites reach the desired peak stage (see below).
3. Understanding the Stages of Beating Eggs
Whether you’re beating whole eggs or just egg whites, it’s essential to recognize the different stages of beaten eggs to avoid over- or under-mixing.
Soft Peak Stage (For egg whites)
Egg whites appear foamy and slightly glossy.
Peaks gently fold over when the whisk is lifted.
Ideal for soufflés or chiffon cakes.
Medium Peak Stage (For egg whites)
Egg whites become thicker and more opaque.
The peaks hold their shape but slightly curl at the tips.
Used for some sponge cakes that need structure but still fold well into batter.
Stiff Peak Stage (For egg whites)
Egg whites hold firm, pointed peaks without collapsing.
The foam appears glossy and smooth.
Used for meringues and some airy sponge cakes (like Angel Food Cake).
Be careful! Overbeaten egg whites become grainy and dry, making them difficult to fold into batter.
Ribbon Stage (For whole eggs and sugar)
Whole eggs mixed with sugar triple in volume and turn pale yellow.
When lifted, the batter falls back in thick ribbons that hold their shape for a few seconds before sinking.
This stage is crucial for sponge cakes like Genoise and Victoria Sponge.
Pro Tip: If your batter reaches the ribbon stage, it means you’ve incorporated enough air for a light and fluffy sponge cake.
4. Common Mistakes to Avoid When Beating Eggs
Even experienced bakers can make mistakes when beating eggs. Here are a few common pitfalls and how to avoid them:
Overbeating the Eggs
- Beating too long can cause the air bubbles to collapse, resulting in a dry or rubbery cake.
- Solution: Stop beating as soon as stiff peaks form (egg whites) or the ribbon stage is reached (whole eggs and sugar).
Underbeating the Eggs
- If eggs are not beaten long enough, they won’t hold enough air, leading to a dense, heavy cake.
- Solution: Check for soft/stiff peaks (egg whites) or the ribbon stage (whole eggs) before stopping.
Using Cold Eggs
- Cold eggs don’t whip as well and take longer to reach the right consistency.
- Solution: Always use room-temperature eggs—if needed, place eggs in warm water for 5–10 minutes before using.
Folding in Egg Whites Too Aggressively
- Stirring too roughly can deflate the foam, causing the cake to lose its light texture.
- Solution: Use a gentle folding motion with a spatula—cut through the middle and fold in a circular motion to preserve the air bubbles.
5. Final Tips for Beating Eggs Like a Pro
Use fresh eggs—they have stronger proteins, which help stabilize the structure.
Whip egg whites in a metal or glass bowl—plastic bowls can hold grease, making it harder to achieve stiff peaks.
Add sugar gradually when beating whole eggs or egg whites—this helps create a more stable foam.
Avoid high-speed mixing—medium to medium-high speed creates smaller, more stable air bubbles.
Folding the mixture correctly
Folding is one of the most delicate and essential techniques in making a perfect sponge cake. Unlike vigorous mixing, which can knock out air and deflate the batter, folding ensures that the mixture remains light and aerated, leading to a sponge cake that is soft, airy, and well-risen.
In this section, we’ll explore:
The importance of folding the mixture properly
The step-by-step method for effective folding
Common mistakes to avoid
1. Why Folding Is Crucial for a Sponge Cake
Folding is used to gently incorporate airy ingredients (like beaten eggs or whipped egg whites) into a denser batter without deflating them. This is especially important in sponge cakes, where the air trapped in the eggs is the primary leavening agent.
If you stir or mix too harshly, the air bubbles will collapse, resulting in a flat and dense sponge cake instead of a light and fluffy one.
Proper folding:
Keeps the air bubbles intact, ensuring a soft texture
Helps distribute ingredients evenly without overworking the batter
Prevents a tough or rubbery texture caused by overmixing gluten in the flour
2. The Correct Folding Technique
The key to folding is using a gentle and deliberate motion to mix the ingredients without deflating the batter. Follow these steps to master the technique:
Use the Right Tools
- A large rubber spatula is best for folding because it’s flexible and helps scrape down the sides of the bowl while mixing.
- A wide mixing bowl allows more space for folding and prevents overworking the batter.
Prepare the Batter Correctly
- If your recipe requires whipped egg whites, they should be beaten to soft or stiff peaks before folding.
- If you’re folding in flour, it should be sifted to avoid lumps and make it easier to incorporate.
Add in Stages
- Instead of adding all the ingredients at once, add them gradually in three or four portions.
- Start by adding a small amount of whipped egg whites (or dry ingredients) to the batter and mix gently to lighten the mixture.
- Then, carefully fold in the remaining ingredients in batches.
The Proper Folding Motion
- Cut through the center of the batter with your spatula.
- Sweep the spatula along the bottom of the bowl in a circular motion, lifting the batter up and over.
- Turn the bowl slightly after each fold to ensure all the ingredients are evenly incorporated.
- Repeat until you see no streaks of unmixed ingredients, but stop as soon as everything is combined—overfolding will deflate the batter.
Tip: Think of folding as “lifting and turning” rather than stirring. The goal is to maintain as much air as possible while ensuring even distribution of ingredients.
3. Common Mistakes to Avoid When Folding
Even experienced bakers can struggle with folding. Here are some common mistakes and how to avoid them:
Stirring Instead of Folding
- Mistake: Stirring too aggressively breaks down air bubbles and creates a dense cake.
- Solution: Always use a gentle folding motion with a spatula instead of stirring with a whisk or spoon.
Adding Ingredients Too Quickly
- Mistake: Dumping all the flour or egg whites in at once makes it harder to fold evenly and can deflate the batter.
- Solution: Add ingredients gradually, folding in small portions at a time.
Overfolding the Batter
- Mistake: Mixing too many times can destroy the air pockets needed for a light sponge.
- Solution: Stop folding as soon as there are no visible streaks of unmixed ingredients. A few small lumps are okay!
Using the Wrong Tool
- Mistake: Using a whisk or electric mixer when folding will overwork the batter.
- Solution: Use a large rubber spatula to gently lift and turn the batter.
4. Final Tips for Perfect Folding
Always sift flour before adding it to the batter—this helps prevent clumps and makes folding easier.
Use room-temperature ingredients—cold ingredients won’t incorporate as smoothly.
Tilt the bowl slightly while folding—this helps distribute ingredients more evenly.
If in doubt, under-fold rather than over-fold—it’s better to have a slightly uneven batter than a deflated one.
Avoiding overmixing the batter
One of the most common mistakes when making sponge cake is overmixing the batter. While mixing is essential for combining ingredients, too much mixing can ruin the texture of your cake, leading to a dense, chewy, or even tough sponge instead of a light and airy one.
In this section, we’ll explore:
Why overmixing happens and how it affects your cake
How to properly mix your batter without deflating it
Tips to avoid overmixing and achieve the perfect sponge
1. What Happens When You Overmix the Batter?
Overmixing causes two major problems that affect the final texture of your sponge cake:
Development of Too Much Gluten
- Flour contains gluten, a protein that gives baked goods structure.
- When flour is mixed with liquid and agitated, gluten strands develop, making the batter elastic.
- While some gluten formation is necessary for structure, too much gluten makes the cake dense and rubbery instead of soft and delicate.
Loss of Air Bubbles
- Sponge cakes rely on incorporated air from beaten eggs to rise and become fluffy.
- Overmixing deflates the air bubbles, making the batter too liquid and resulting in a flat, heavy cake.
- This often leads to a hard, compact sponge instead of a tender, airy crumb.
The key takeaway? Overmixing makes your cake dense and tough instead of light and soft!
2. How to Mix the Batter Correctly
The best way to avoid overmixing is to mix gently and stop as soon as the ingredients are combined. Follow these steps to mix your sponge cake batter properly:
Mix Dry and Wet Ingredients Separately
- Before combining, whisk all dry ingredients (flour, baking powder, etc.) in a separate bowl.
- This prevents the need for excessive mixing later.
- Do the same with wet ingredients, like eggs and milk, so they blend more easily.
Use the Folding Technique
- Instead of stirring vigorously, use a gentle folding motion when incorporating flour into the wet ingredients.
- Cut through the center with a spatula, sweep along the bottom, and lift the batter over itself.
Stop Mixing as Soon as There Are No Streaks
- Do not aim for a completely smooth batter—a few small lumps are okay!
- Overmixing in an attempt to make the batter “perfect” will actually ruin the cake.
Tip: If you are using an electric mixer, set it to low speed and mix in short bursts to avoid overworking the batter.
3. Common Mistakes That Lead to Overmixing
Mixing the Batter Too Long
- Mistake: Mixing for several minutes trying to make the batter ultra-smooth.
- Solution: Once all ingredients are combined and no large flour streaks remain, stop immediately!
Using High-Speed Mixing
- Mistake: Using a high-speed setting on a stand mixer or hand mixer.
- Solution: Always use low speed when adding dry ingredients or fold by hand.
Adding Flour All at Once
- Mistake: Dumping all the flour in at once makes it harder to mix evenly without overworking.
- Solution: Add flour gradually in small portions and fold gently.
Not Sifting Dry Ingredients
- Mistake: Unsifted flour leads to lumps, making bakers mix longer to smooth them out.
- Solution: Always sift flour before adding to the batter for even distribution.
4. Pro Tips to Prevent Overmixing
Use a rubber spatula instead of a whisk or wooden spoon—spatulas are more flexible for gentle mixing.
Tilt the bowl slightly while folding—this helps you mix more efficiently with fewer strokes.
Mix in short bursts if using a hand mixer, stopping frequently to check consistency.
Set a time limit—most sponge cake batters should be mixed for less than a minute after adding flour.
When in doubt, under-mix rather than over-mix—it’s better to have a few flour specks than a dense cake!
How to Ensure Your Sponge Cake Is Moist and Soft
Choosing the right flour
Flour is one of the most essential ingredients in a sponge cake, as it provides the structure and texture that define the cake’s light, airy, and delicate crumb. Selecting the right type of flour can make all the difference between a soft, fluffy sponge and a dense, heavy cake.
In this section, we’ll explore:
The best types of flour for sponge cakes
How protein content affects the texture
The importance of sifting flour
Common flour mistakes to avoid
1. Understanding the Role of Flour in a Sponge Cake
Flour plays a crucial role in sponge cakes by:
- Providing structure: The proteins in flour form gluten, which helps hold the cake together.
- Absorbing moisture: Flour interacts with eggs and liquids to create the right batter consistency.
- Affecting texture: The type of flour determines whether the cake is light and airy or dense and heavy.
Because sponge cakes rely on air and eggs for leavening rather than yeast or baking powder, choosing a flour with the right gluten content is key to getting the perfect texture.
2. Best Types of Flour for Sponge Cakes
Different types of flour contain varying amounts of protein, which affects gluten development. Here’s a breakdown of the best flour choices for sponge cake:
Cake Flour (Best Choice!)
Protein content: 6-8% (low)
Texture: Ultra-light, soft, and delicate
Why it works:
- Cake flour has less protein, meaning less gluten development, which keeps the sponge cake soft and tender.
- It creates a fine crumb and a light, airy texture, making it the best option for sponge cakes.
- Many professional bakers swear by cake flour for perfectly fluffy cakes.
Tip: If you don’t have cake flour, you can make a substitute:
- Measure 1 cup of all-purpose flour
- Remove 2 tablespoons of flour
- Replace it with 2 tablespoons of cornstarch
- Sift well to combine
All-Purpose Flour (Okay Substitute, But Not Ideal)
Protein content: 10-12% (moderate)
Texture: Slightly denser than cake flour
Why it works:
- All-purpose flour is more widely available and can be used if you don’t have cake flour.
- However, it has a higher protein content, meaning more gluten formation, which can make sponge cakes firmer and less airy.
- To compensate, you can sift all-purpose flour multiple times or use the cake flour substitute method above.
Pastry Flour (Good Alternative to Cake Flour)
Protein content: 8-9% (medium-low)
Texture: Soft and delicate, but slightly firmer than cake flour
Why it works:
- Pastry flour falls between cake flour and all-purpose flour in terms of protein content.
- It can be used as a good alternative to cake flour if you want a slightly more structured sponge cake.
Self-Raising Flour (Use with Caution)
Protein content: Varies (usually 8-10%)
Texture: Light, but can be inconsistent
Why it works (or doesn’t):
- Self-raising flour already contains baking powder and salt, which can alter the cake’s texture and rise.
- Traditional sponge cakes don’t rely on baking powder, as they get their rise from beaten eggs.
- If using self-raising flour, adjust other ingredients carefully to avoid an uneven cake.
3. The Importance of Sifting Flour
Regardless of which flour you choose, sifting is crucial when making sponge cake. Here’s why:
Breaks up lumps: Ensures an even, smooth batter without flour pockets.
Incorporates air: Makes the flour lighter, contributing to a fluffy cake.
Prevents overmixing: Helps dry ingredients blend in faster, reducing the risk of overmixing.
Pro Tip: Sift flour at least twice before adding it to the batter for the best results!
4. Common Flour Mistakes to Avoid
Using Bread Flour
- Bread flour has too much protein (12-14%), leading to tough, chewy cakes instead of light, airy sponges.
Skipping the Sifting Step
- Un-sifted flour can result in clumps, uneven mixing, and a dense cake.
Adding Too Much Flour
- Sponge cake batter should be light and delicate. Adding too much flour can make it heavy and dry.
- Always measure flour correctly using the spoon and level method instead of scooping directly from the bag.
Adding a touch of moisture
Moisture is a key factor in achieving a soft, tender, and flavorful sponge cake. While sponge cakes are known for their light and airy texture, they can sometimes turn out too dry if the right balance of moisture isn’t maintained. The good news? A few simple tweaks can ensure your cake stays moist, delicate, and absolutely irresistible.
In this section, we’ll cover:
Why moisture is important for sponge cakes
The best ingredients for keeping your cake moist
Techniques to lock in moisture during baking and cooling
Common mistakes that lead to dry sponge cakes
1. Why Moisture Matters in a Sponge Cake
Moisture is essential because it:
Prevents dryness – A dry sponge cake is unpleasant to eat and lacks the soft, melt-in-your-mouth quality that makes sponge cakes so special.
Enhances flavor – Ingredients like butter, milk, or syrup not only add moisture but also enhance the overall taste.
Affects texture – The right amount of moisture ensures a delicate, springy, and tender crumb rather than a dense or crumbly cake.
Sponge cakes rely heavily on eggs, sugar, and air for their structure, meaning there’s less fat compared to butter-based cakes. This is why adding moisture in strategic ways is essential.
2. Best Ingredients for Keeping Your Sponge Cake Moist
There are several ways to introduce moisture into a sponge cake without compromising its lightness. Here are some of the best ingredients to use:
Eggs
Why it works: Eggs provide both structure and moisture. The yolks contain natural fats that help keep the cake soft.
Pro Tip: Using extra egg yolks (instead of whole eggs) in some recipes can add extra richness and moisture.
Sugar
Why it works: Sugar is hygroscopic, meaning it attracts and holds onto moisture, helping keep the cake tender.
Pro Tip: Using brown sugar instead of white sugar in some recipes adds more moisture due to its molasses content.
Oil or Butter
Why it works: Fat helps coat the flour particles, reducing gluten formation and preventing dryness.
Which to use?
- Butter adds a rich flavor and contributes to a soft texture.
- Oil (vegetable, canola, or sunflower oil) can make sponge cakes even softer and moister than butter, as oil remains liquid at room temperature.
Pro Tip: Some bakers replace a small portion of butter with oil for the best of both worlds—flavor from butter, moisture from oil.
Milk or Buttermilk
Why it works: Dairy adds tenderness and enhances flavor while also helping the cake retain moisture.
Pro Tip: Using buttermilk or yogurt instead of regular milk can add a slight tang and create an ultra-moist crumb.
Simple Syrup (for Extra Moisture Boost!)
Why it works: Brushing the cake layers with a simple sugar syrup keeps the cake moist for longer.
How to make it:
- Mix equal parts sugar and water (e.g., ½ cup sugar + ½ cup water).
- Heat until the sugar dissolves, then let it cool.
- Brush the syrup lightly over the sponge cake after baking.
Pro Tip: Infuse the syrup with vanilla, citrus zest, or liqueur for extra flavor.
3. Techniques to Lock in Moisture
Even with the right ingredients, the way you bake and store your cake also plays a huge role in keeping it moist. Here’s how to trap and retain moisture effectively:
Don’t Overbake – The longer a sponge cake bakes, the more moisture it loses. Bake until a toothpick just comes out clean, not until it’s completely dry.
Use the Right Pan – Dark-colored cake pans absorb more heat, which can lead to a drier cake. Instead, opt for light-colored aluminum pans for even baking.
Cover Immediately After Cooling – Once the cake has cooled slightly, cover it with plastic wrap or store it in an airtight container to lock in moisture.
Store Properly – If not serving immediately, wrap the cake in plastic wrap and store it at room temperature (not in the fridge, which can dry it out).
Freeze for Later – If you need to store the cake for an extended time, wrap it well and freeze it. When ready to serve, let it thaw at room temperature in its wrapping to retain moisture.
4. Common Mistakes That Lead to Dry Sponge Cakes
Overmixing the Batter
- Overmixing can cause too much gluten development, leading to a tough, dry cake.
- Always fold ingredients gently to keep the batter light and airy.
Baking at Too High a Temperature
- If the oven is too hot, the cake will dry out before it’s fully cooked inside.
- Always use an oven thermometer to ensure accuracy.
Using Too Much Flour
- Excess flour absorbs moisture, making the cake dense and dry.
- Always measure using the spoon-and-level method (not by scooping directly from the bag).
Skipping the Simple Syrup
- If your cake seems dry, don’t skip brushing it with simple syrup! This small step can make a big difference in moisture retention.
Avoiding overbaking
One of the most crucial steps in baking a sponge cake is knowing when to pull it out of the oven. While it might be tempting to leave it in longer to ensure it’s cooked all the way through, overbaking is a surefire way to end up with a dry, tough sponge cake. Understanding how to avoid overbaking will help you create a light, airy, and tender cake that melts in your mouth.
In this section, we’ll cover:
The signs that indicate overbaking
Why overbaking affects texture and moisture
The ideal baking time and how to test for doneness
Tips for perfect baking every time
1. The Signs of Overbaking
Overbaking can sometimes be subtle, but there are clear signs to watch out for during the baking process. These include:
Dry, Cracked Top
An overbaked sponge cake often has a cracked and dry top. If the top is visibly cracked or browned too much, the cake may have been in the oven too long.
Hard, Dense Texture
When overbaked, the texture of the cake can become tough and dense, rather than light and airy. A sponge cake should feel soft when pressed lightly. If it feels firm or dense, it might have been exposed to too much heat.
Browning on the Edges
While a lightly golden edge is normal, dark or overly brown edges may indicate that the cake is beginning to dry out and is overbaked.
2. Why Overbaking Affects Texture and Moisture
Overbaking can have a serious impact on the final outcome of your sponge cake. Here’s why it’s so important to avoid:
Loss of Moisture
The longer the cake stays in the oven, the more moisture evaporates. As a result, the cake becomes drier and drier, making it difficult to achieve that signature soft and moist texture.
Toughness Due to Overcooking the Protein
Sponge cakes rely on the egg proteins for structure. Overbaking causes the proteins to tighten too much, which makes the cake tough and rubbery rather than light and fluffy.
Texture Becomes Dense and Stale
A perfectly baked sponge cake has a light, fluffy crumb, but overbaking creates a cake that lacks air pockets. The batter starts to lose its delicate texture, resulting in a heavy, dense crumb that’s less appetizing.
3. The Ideal Baking Time and How to Test for Doneness
Knowing the perfect baking time and testing for doneness are essential in preventing overbaking.
Baking Time and Temperature
For most sponge cake recipes, baking typically takes about 20 to 30 minutes at a moderate temperature, usually around 325°F to 350°F (165°C to 175°C). However, baking times can vary depending on the size of your cake pan and your oven, so it’s important to keep an eye on your cake.
The Toothpick Test
The most reliable way to check if your sponge cake is done is the toothpick test. Simply insert a toothpick or cake tester into the center of the cake. If it comes out clean or with a few crumbs attached, the cake is done. If it comes out wet with batter, it needs more time. Be careful not to leave the toothpick in too long, as this can also dry out the cake.
The Touch Test
Another way to check doneness is by gently pressing on the center of the cake. If it springs back and doesn’t leave an indentation, it’s done. If it stays indented, it needs a few more minutes of baking.
The Visual Cues
The edges of the cake should begin to pull away from the sides of the pan, and the top should be golden brown but not overly dark. These are also signs that the cake is nearing completion.
4. Tips for Perfect Baking Every Time
To avoid overbaking and ensure your sponge cake turns out perfectly every time, consider these tips:
Use an Oven Thermometer
Ovens can sometimes run hotter or cooler than the settings indicate. Using an oven thermometer will give you a more accurate reading of your oven temperature, helping you avoid overheating.
Check the Cake Early
Start checking the cake about 5 minutes before the suggested baking time is up. If you wait until the end of the recommended time, you risk overbaking, especially if your oven runs hot.
Avoid Opening the Oven Too Often
Opening the oven door too frequently during the baking process can cause the temperature to fluctuate, which can lead to uneven baking and overbaking. It’s best to wait until the end of the recommended baking time to check.
Rotate the Pan
If your oven has hot spots, rotating the cake halfway through the baking time can help ensure even cooking. This helps prevent the cake from becoming too dry on one side.
5. What to Do If You Overbake
If you’ve accidentally overbaked your sponge cake, don’t despair! There are a few ways to salvage it:
Soak with Syrup
Brushing the overbaked cake with a simple syrup can add moisture back into it. You can infuse the syrup with flavors like vanilla or citrus to enhance the cake.
Frost or Fill
A generous layer of whipped cream, frosting, or jam can help mask the dryness and bring moisture back to the cake. Consider stacking layers of frosting between the cake layers for extra softness.
Turn it into Trifle
If the sponge cake is too dry to enjoy on its own, break it into pieces and layer it in a trifle dish with custard, whipped cream, and fruits. The moist layers will help balance out any dryness.
Cooling your cake properly
Once your sponge cake is out of the oven, it’s essential to cool it properly. Cooling is a vital step in ensuring that your cake doesn’t become soggy or lose its perfect texture. While it may be tempting to dig in right away, a few extra minutes of care during the cooling process can make a significant difference in the outcome of your sponge cake.
In this section, we will discuss:
Why cooling is important
How to cool your cake without ruining its texture
The best cooling techniques for different types of cakes
Common mistakes to avoid when cooling your sponge cake
1. Why Cooling is Important
Proper cooling helps maintain the integrity of your cake and allows it to set properly. If you skip this step or rush through it, the cake could turn out with uneven texture or may collapse under its own weight. Here’s why cooling is essential:
Sets the Structure
When your sponge cake is first removed from the oven, it’s still very hot and soft. Cooling it allows the structure to set, letting the air bubbles and proteins in the cake form a stable texture. If you cut into it too soon, it may collapse or deflate because it hasn’t had time to firm up.
Prevents Soggy Cake
One common mistake is leaving the cake in the pan for too long after baking. Trapped steam can moisten the bottom of the cake, causing it to become soggy. Proper cooling prevents this by allowing any excess steam to escape.
Maintains Flavor
Allowing the cake to cool fully also ensures that the flavors settle and become more pronounced. A hot sponge cake may taste slightly different than one that has cooled down completely, and the cooling process gives it time to reach its optimal flavor profile.
2. How to Cool Your Cake Without Ruining Its Texture
The way you cool your cake directly affects its final texture. Here’s how to ensure your sponge cake cools evenly and maintains its light, airy consistency:
Let it Cool in the Pan for a Few Minutes
After removing the cake from the oven, let it sit in the pan for 5–10 minutes. This short period allows the cake to firm up slightly and makes it easier to remove from the pan without breaking or sticking to the edges.
Turn the Cake Out onto a Cooling Rack
Once the cake has cooled slightly in the pan, it’s time to turn it out. Gently invert the pan onto a cooling rack. If necessary, lightly tap the bottom of the pan to help release the cake.
A cooling rack is essential for this step. It allows air to circulate around the entire cake, preventing moisture from building up on the sides and bottom. This helps maintain the fluffiness and texture of the sponge cake.
Keep it Raised
When you transfer the cake to the cooling rack, make sure it’s placed in a position where air can circulate freely around all sides of the cake. If you leave it sitting directly on a flat surface, the underside may trap moisture, leading to a soggy bottom.
3. The Best Cooling Techniques for Different Types of Cakes
While sponge cakes often benefit from these basic cooling methods, there are some special considerations depending on the type of cake and its size:
Smaller Cakes and Cupcakes
For smaller sponge cakes or cupcakes, the cooling process is quicker, but the same principles apply. These should be placed on a cooling rack after a few minutes of rest in the pan. If you’re making cupcakes, they’ll cool faster than a full-sized cake, so check on them sooner to avoid overcooling or becoming too dry.
Layer Cakes
If you’re baking a multi-layered sponge cake, it’s essential to allow each layer to cool completely before stacking. Placing hot layers directly on top of one another can cause them to become soggy. Allow them to cool on a rack, and if necessary, wrap them loosely in plastic wrap or wax paper to keep them from drying out.
Cakes with Fillings or Frosting
If you plan to frost or fill the cake, make sure the sponge cake is fully cooled to room temperature. If the cake is still warm, the frosting may melt or slide off. In some cases, a slightly warm cake can help the frosting adhere, but if it’s too hot, it can create a mess. Patience is key!
4. Common Mistakes to Avoid When Cooling Your Sponge Cake
There are a few common errors people make when cooling their cakes that can affect the final result:
Letting the Cake Cool in the Pan for Too Long
While letting the cake cool in the pan briefly is important, leaving it in the pan for too long can trap moisture, making the cake soggy. Once it has cooled slightly, always transfer the cake to a cooling rack.
Moving the Cake While It’s Too Hot
Avoid moving the cake when it’s still too warm. Shifting the cake while it’s still soft can cause it to lose shape or break. Be sure it has cooled enough that it can hold its shape before attempting to move it.
Cooling in a Drafty Area
Don’t cool your sponge cake in a drafty area like near an open window or air conditioner. Sudden temperature changes can cause the cake to shrink or crack. Instead, place it in a cool, dry area with a consistent temperature.
Covering the Cake Too Early
Covering your cake too soon can trap heat and moisture inside, which can make it soggy or affect the texture. Allow it to cool uncovered for at least 30 minutes before wrapping or frosting.
5. Speeding Up the Cooling Process (If Necessary)
If you’re in a rush and need to cool the cake quickly, here are a few methods to speed up the process without compromising its texture:
Refrigerate or Freeze for a Short Time
If you need to cool the cake faster, you can place it in the refrigerator or freezer for 10-15 minutes. This helps to cool it down more quickly but should be done cautiously—overexposure to cold temperatures can dry the cake out or cause it to become too firm.
Use a Fan
Placing a fan near the cooling rack can also help to circulate air and cool the cake faster. Just be sure the fan isn’t blowing directly on the cake, as this could cause uneven cooling.
Step-by-Step Guide to Baking a Perfect Sponge Cake
Step 1: Prepping your baking tools and oven
Before you even begin mixing your ingredients, ensuring that your baking tools and oven are properly prepared is crucial for achieving a perfect sponge cake. This initial step sets the foundation for the rest of the baking process and can significantly impact the final outcome of your cake. If your oven is not preheated correctly or your baking tools are not ready, you could face uneven baking, sticking issues, or even overbaking or underbaking. Here’s a detailed look at what needs to be done:
1. Preheating Your Oven: The Key to Even Baking
A sponge cake requires an oven temperature that is just right to produce the airy, fluffy texture we all love. If the oven isn’t at the proper temperature when the cake batter is ready, the result can be less than ideal. Preheating your oven ensures that the heat is distributed evenly, and the cake starts baking immediately when placed inside, giving it the right rise and texture.
Setting the Temperature Correctly
For most sponge cake recipes, you’ll typically want to set the oven to 350°F (175°C). However, some recipes may require a slightly lower temperature, around 325°F (163°C), depending on the specific ingredients. Always check your recipe for the exact temperature to avoid overbaking or underbaking.
Giving It Enough Time to Preheat
Preheating your oven can take anywhere from 10–20 minutes, depending on the type of oven. Don’t rush this step! Give it enough time to reach the desired temperature before placing the batter in the oven. Most ovens have a preheat indicator to let you know when the oven has reached the correct temperature.
2. Preparing the Cake Pan: Ensuring Your Cake Doesn’t Stick
Preparing the cake pan properly is essential for ensuring that your sponge cake comes out easily after baking. It prevents the cake from sticking to the sides or bottom of the pan, which can lead to uneven texture or broken pieces when trying to remove it. Here’s what to do:
Greasing the Pan
Although some sponge cake recipes may suggest using parchment paper, it’s still a good idea to lightly grease the pan to prevent sticking. Use butter, vegetable oil, or a non-stick spray. Lightly grease the bottom and sides of the pan for optimal results.
Adding Parchment Paper (Optional)
For an even easier cake release, you can line the bottom of the pan with parchment paper. If your recipe calls for multiple layers of cake, it’s essential to line each pan with parchment paper so that the cakes come out in one solid piece.
Flouring the Pan (Optional)
After greasing the pan, you may also want to lightly dust it with flour, especially if you’re making a cake with a delicate crumb. Tap out any excess flour to avoid leaving a white residue on the sides of the cake after baking. This step is not always necessary for sponge cakes, but it’s useful in certain cases.
3. Organizing Your Tools: Efficiency and Readiness
Having all your baking tools organized and ready for use will streamline the process, prevent last-minute searching, and make sure you have everything at hand when it’s time to bake.
Measuring Cups and Spoons
Accurate measurements are essential in any baking recipe. Have your measuring cups and spoons ready to ensure the ingredients are measured correctly, particularly for the flour and sugar. Since sponge cakes are all about precision, even small variations in ingredient amounts can impact the texture and structure of the cake.
Whisk or Electric Mixer
Sponge cakes rely on properly beaten eggs to get their signature light texture, so you’ll need either a whisk (for manual beating) or an electric mixer (for quicker, more consistent results). If you’re using an electric mixer, make sure it’s ready to go with the appropriate attachment (usually a whisk or beater).
Spatula and Mixing Bowls
Ensure you have a spatula ready for folding the ingredients once the eggs have been beaten. Mixing bowls should be clean and spacious enough to comfortably mix all of your ingredients. When folding the batter, a large enough bowl will allow you to gently incorporate the ingredients without deflating the air from the whipped eggs.
4. Checking the Oven’s Accuracy: Avoiding Hot Spots
Ovens can have hot spots or inconsistent temperature distribution, which can affect the evenness of your bake. If your oven tends to have hot spots, you may need to adjust the position of the cake pan during the baking process.
Oven Thermometer
To ensure your oven is actually at the correct temperature, use an oven thermometer. Ovens can often run hotter or cooler than their digital display indicates, and a thermometer will give you an accurate reading to ensure the temperature is just right for your sponge cake.
Avoid Opening the Oven Door Too Early
Every time you open the oven door, the temperature inside fluctuates, which can cause your sponge cake to collapse or bake unevenly. Avoid opening the oven door during the first 15-20 minutes of baking to allow the cake to rise evenly. Once it starts to firm up, you can check for doneness.
5. Preparing the Work Area: Stay Organized for Efficiency
Lastly, it’s important to organize your workspace so that you can easily move from step to step without distractions. Clear your counter space of any unnecessary items and have your ingredients measured and ready to go. This helps you maintain the flow of the baking process and keeps everything running smoothly.
Step 2: Mixing the ingredients
Once you’ve prepped your tools, oven, and ingredients, the next critical step in creating a perfect sponge cake is mixing the ingredients. This step is where you bring everything together and begin to form the delicate batter that will eventually rise into a light, airy cake. The way you mix the ingredients has a direct impact on the texture, lightness, and fluffiness of your sponge cake. Here’s a detailed guide on how to approach this step carefully and effectively:
1. Whisking the Eggs: Building the Foundation for Airy Texture
The most crucial element in sponge cake is the whisking of the eggs. The goal is to introduce as much air as possible into the batter, which will help your cake rise beautifully and achieve that fluffy, light texture.
Using Room Temperature Eggs
Start by ensuring that your eggs are at room temperature. Cold eggs can be more difficult to incorporate and may not achieve the same volume when beaten. Allow your eggs to sit out for about 30 minutes before use, or place them in warm water for a few minutes to bring them to the right temperature.
Beating to Soft Peaks
When beating the eggs, you’re aiming for soft peaks, which means the beaten eggs should form peaks that gently bend over when you lift the whisk out. This stage is crucial, as it creates the necessary structure for the cake. Over-beating can lead to a dense or dry cake, so stop once you achieve this soft, airy texture.
Adding Sugar Gradually
Most sponge cake recipes call for sugar to be added to the eggs as they are being beaten. Add the sugar gradually, spoonful by spoonful, to ensure it dissolves properly into the eggs and doesn’t deflate the air you’ve incorporated. The sugar helps stabilize the beaten eggs and contributes to the cake’s sweetness and golden color.
2. Sifting the Dry Ingredients: Ensuring Even Distribution
Sifting the dry ingredients—such as flour, baking powder, and sometimes cornstarch—is essential for ensuring that your sponge cake batter is smooth, airy, and lump-free. Proper sifting helps to evenly distribute the ingredients, ensuring that your cake rises uniformly and has a delicate crumb texture.
Sifting the Flour
Flour naturally tends to clump, so sifting it helps to break up these clumps, ensuring a smooth batter. It also aerates the flour, helping to keep the batter light and fluffy. Be sure to sift the flour multiple times for maximum effect, especially if you are using flour that has been stored for a long time.
Incorporating Baking Powder
If your recipe calls for baking powder or another leavening agent, be sure to sift it along with the flour. This ensures an even distribution of the leavening agent, preventing the cake from having uneven rises or a lumpy texture.
3. Combining Wet and Dry Ingredients: Folding vs. Stirring
Once you’ve beaten your eggs and sifted your dry ingredients, the next challenge is combining everything without losing the volume and air you’ve worked so hard to incorporate.
Folding, Not Stirring
The key to gently incorporating the dry ingredients into the beaten eggs is folding, not stirring. Folding is a slow, careful technique where you lift the ingredients from the bottom of the bowl and fold them over the top. This preserves the air trapped in the eggs and prevents deflation, ensuring your sponge cake remains light and fluffy.
Use the Right Tools for Folding
Use a silicone spatula or a metal spoon for folding the mixture. These tools allow you to carefully lift and fold without deflating the batter. Avoid using a whisk or electric mixer at this stage, as they could overwork the batter.
4. Incorporating Additional Ingredients: Butter, Milk, and Flavors
Some sponge cake recipes may include ingredients like melted butter, milk, or vanilla extract to enhance flavor and texture. These ingredients are typically added after the eggs and dry ingredients have been folded together.
Adding Melted Butter
If your recipe calls for melted butter, make sure it has cooled slightly before adding it to the batter. Adding hot butter can cause the eggs to cook prematurely, which could impact the texture. Once added, gently fold the butter into the batter until fully incorporated.
Adding Milk (if applicable)
If the recipe calls for milk, it’s usually added in a slow, steady stream while you continue folding the batter. Milk adds moisture and helps achieve a smooth, consistent texture. Make sure to add it gradually to avoid deflating the batter.
Flavorings and Extracts
For an extra layer of flavor, you can add vanilla extract or other flavorings (such as almond or citrus zest) at this point. Be mindful not to add too much liquid flavoring, as it could affect the batter’s consistency and texture.
5. Ensuring the Right Consistency
As you mix the ingredients, keep an eye on the consistency of the batter. It should be smooth, light, and pourable, but not runny. The batter should flow off the spatula slowly, without being too thick or too thin. If it seems too thick, you can add a tiny bit of milk or water, but only sparingly to avoid altering the texture.
Test the Consistency
To test the batter’s consistency, you can lift a small amount with your spatula and let it fall back into the bowl. The batter should form a ribbon-like effect, where it gently folds over itself without disappearing too quickly. This indicates the batter is ready for the next step.
6. Final Check: Airy, Smooth, and Ready for Baking
Before you transfer the batter into your prepared cake pan, give it one final check. The mixture should be light and airy, with a smooth, uniform consistency. There should be no lumps, and the batter should have a slight elasticity to it as it holds together but is not too thick.
Once you’re confident in the batter’s consistency, it’s time to move on to the next step and pour the batter into the pan, ready to bake.
Step 3: Baking the cake
The baking step is where all the hard work and careful preparation come together. It’s where the batter transforms from a smooth mixture into a beautifully risen, light, and fluffy sponge cake. However, achieving the perfect bake requires attention to detail, as even small changes in temperature, time, or handling can affect the final result. Here’s a breakdown of how to bake your sponge cake perfectly, ensuring it rises beautifully and maintains that tender texture you’ve worked so hard to create.
1. Preheating the Oven: Ensuring Consistent Heat
Before you even think about putting the cake into the oven, you need to preheat your oven to the proper temperature. Preheating ensures that the cake begins to bake as soon as it enters the oven, allowing the batter to rise evenly and set at the right pace.
The Importance of Preheating
Starting with a preheated oven is crucial for a sponge cake because it prevents the batter from sitting and deflating. Sponge cakes rely on the immediate heat to set the air in the batter, allowing it to rise. A cold oven can cause the cake to bake unevenly, leading to an underwhelming rise and dense texture.
Correct Temperature
For most sponge cakes, the recommended baking temperature is around 325°F to 350°F (160°C to 175°C). However, every oven is different, and it’s a good idea to check the oven temperature with an oven thermometer if you’re uncertain. Too high a temperature can cause the cake to brown too quickly on the outside, while too low a temperature may result in a dense, undercooked center.
2. Preparing the Cake Pan: Ensuring Easy Release
Properly preparing your cake pan is essential to avoid any sticky situations when it’s time to remove the cake. If you don’t prep the pan well, your sponge cake could get stuck to the sides, ruining its perfect shape.
Greasing the Pan
For most sponge cakes, it’s best to grease the pan lightly with butter or oil, ensuring that all sides are covered. Then, dust the pan lightly with flour or use parchment paper to line the base. This will help the cake come out easily once it’s baked.
Use the Right Pan Size
Choosing the right size pan is also key for even baking. Most sponge cake recipes call for an 8-inch or 9-inch round pan, but be sure to follow your recipe’s instructions. Using a pan that is too large can cause the batter to spread too thin, leading to a flat cake, while a pan that is too small can cause the batter to rise too high, creating an uneven or cracked top.
3. Pouring the Batter into the Pan: Gentle Handling
After carefully mixing the batter, it’s time to transfer it into the prepared pan. This step may seem straightforward, but handling the batter gently is essential to maintaining the air you’ve incorporated.
Avoid Overfilling the Pan
Pour the batter into the pan until it is about half to two-thirds full, allowing room for the cake to rise. If you fill the pan too much, the cake may overflow, or it may not rise evenly, leading to an imperfect texture.
Leveling the Batter
Once the batter is in the pan, use a spatula or the back of a spoon to gently smooth the top and make it even. This ensures that the cake bakes uniformly, preventing any unsightly domes or uneven rises.
4. Baking the Cake: Monitoring the Process
Now comes the moment when your sponge cake will start to bake and rise, so it’s important to monitor the baking process carefully.
Avoid Opening the Oven Door
One of the biggest mistakes you can make while baking a sponge cake is opening the oven door too early. This lets the heat escape and can cause the cake to sink or collapse. Try to resist the temptation to peek for the first 20-30 minutes of baking. If you open the door too soon, the rapid temperature change can cause the batter to deflate, leading to a flat or dense cake.
Even Baking
While the cake bakes, keep an eye on it through the oven window. The cake should begin to rise gradually and take on a light golden color. To ensure the cake bakes evenly, it may help to rotate the pan halfway through the baking time (if your oven has hot spots).
5. Testing for Doneness: Ensuring the Cake Is Fully Baked
Testing whether your sponge cake is fully baked is essential to avoid undercooking or overcooking it. Fortunately, there are a few simple ways to check if the cake is done.
The Toothpick Test
The most reliable way to check if your sponge cake is baked is by performing the toothpick test. Gently insert a toothpick or cake tester into the center of the cake. If it comes out clean or with just a few moist crumbs clinging to it, the cake is done. If the toothpick comes out with wet batter, the cake needs more time in the oven.
Touch Test
Another method is the touch test. Lightly press the top of the cake with your fingertip. If it springs back immediately, the cake is done. If your finger leaves an indentation or the cake feels soft and squishy, it needs more time.
6. Avoiding Overbaking: Preserving the Lightness
One of the most important things to keep in mind when baking sponge cake is avoiding overbaking. Overbaking can lead to a dry, crumbly cake that lacks the lightness and moistness that a good sponge cake should have.
Watch the Color
Keep an eye on the cake’s color; it should be a light golden brown. If it starts to darken too much before it’s fully cooked, lower the oven temperature slightly to prevent burning.
Timing Is Key
Most sponge cakes bake in around 20-30 minutes, depending on the size and type of cake. Stick to the recommended baking time, but always use a combination of visual cues and testing to ensure doneness.
7. Letting the Cake Cool in the Pan: Giving It Time to Set
Once your sponge cake has finished baking, remove it from the oven, but don’t rush to remove it from the pan just yet.
Cooling in the Pan
Allow the cake to cool in the pan for about 10-15 minutes. This cooling period helps the cake set and reduces the chances of it breaking or falling apart when you remove it.
Run a Knife Around the Edges
Once the cake has cooled slightly, you can run a knife or offset spatula around the edges to loosen it from the sides of the pan. Then, carefully invert the pan to release the cake onto a cooling rack.
Step 4: Cooling and serving
Once your sponge cake is out of the oven, the cooling and serving process becomes just as important as the baking itself. Properly cooling your cake ensures it retains the perfect texture, preventing it from becoming soggy or shrinking. The way you serve it can elevate its appearance, making it the centerpiece of any dessert table. Let’s break down the key steps to follow for the perfect cooling and serving experience.
1. Cooling Your Cake to Set the Texture
Proper cooling helps preserve the delicate structure and light texture of a sponge cake. It’s essential to allow the cake to cool slowly and evenly to prevent any dramatic shifts in temperature that might cause it to collapse or shrink. Here’s how to cool your cake to perfection:
Let the Cake Rest in the Pan
Once you’ve removed the cake from the oven, let it rest in the pan for 10-15 minutes. This initial resting period allows the cake to firm up slightly, making it easier to handle without the risk of it breaking or becoming misshapen. The cake continues to cook a bit from residual heat during this time, which is important for ensuring it’s fully baked through.
Transfer to a Cooling Rack
After the resting time, carefully invert the cake onto a cooling rack or use a flat spatula to gently lift it out of the pan. Avoid letting the cake sit directly in the pan for too long, as it may trap moisture, which can result in a soggy bottom. The cooling rack allows air to circulate around the cake, helping it cool evenly on all sides. Be sure to let the cake cool completely before frosting or slicing it. This prevents melting frosting or collapsing layers.
Avoid Wrapping It While Hot
Don’t wrap your cake in plastic wrap or foil while it’s still warm. Doing so traps steam, which can soften the cake and make it soggy. Let the cake cool at room temperature in a well-ventilated area, away from any drafts.
2. Deciding When to Serve Your Cake
It’s essential to give your sponge cake time to reach the perfect serving temperature. Although sponge cakes are often served at room temperature, if you plan on frosting or decorating it, you might want to refrigerate it briefly. Here are the key considerations for serving your cake:
Room Temperature for Lightness and Flavor
For the best texture and flavor, serve your sponge cake at room temperature. A cold cake can lose some of its light, airy qualities, and its flavors might not come through as strongly. To achieve this, plan to remove the cake from the fridge (if refrigerated) about 30 minutes to an hour before serving.
Chilling for a Firmer Texture (Optional)
If you need to stack or layer your sponge cake, you can refrigerate it for 15-30 minutes to set the structure. This will give it a firmer texture, making it easier to cut and frost without crumbling.
3. Decorating and Serving Your Cake
Now that your sponge cake is cooled and ready, it’s time to add the final touches. How you serve and decorate your cake can significantly affect its presentation and overall appeal.
Simple Powdered Sugar Dusting
For a quick and elegant finish, dust the top of the cake with a light sprinkle of powdered sugar or cocoa powder. This simple touch adds a nice visual appeal without overwhelming the lightness of the sponge cake. You can use a fine mesh sieve to evenly distribute the sugar.
Frosting and Filling
If you’re planning to frost the cake, make sure the cake is completely cooled before you begin. Buttercream or whipped cream work wonderfully with sponge cakes, but be sure to apply them gently to avoid deflating the cake’s airy structure. You can also use fresh fruit, jam, or a light glaze to enhance the flavor.
Layering the Cake
For a more decadent treat, you can slice the cake into layers and fill it with whipped cream, fresh fruit, or custard. Sponge cake works wonderfully for layered cakes, as its light texture complements rich fillings without becoming too heavy. When stacking layers, use a serrated knife to carefully cut the cake into even layers, ensuring all pieces are uniform for a neat presentation.
4. Cutting and Serving the Cake
Cutting the cake properly helps maintain its lightness and ensures a clean, even presentation. Here’s how to do it without compromising the delicate texture:
Use a Serrated Knife
Use a serrated knife to slice the cake. This allows you to gently cut through the delicate crumb without pressing down too hard, which could cause the cake to deflate. If you’re cutting a layered cake, make sure to use a gentle sawing motion to preserve each layer’s height and fluffiness.
Serve in Small, Elegant Slices
Sponge cake is typically best served in small, elegant slices, especially if it’s rich with frosting or fillings. This will allow guests to enjoy the light texture while savoring the full flavor of the cake.
Pairing with Sauces or Accompaniments
For an extra touch, you can serve the cake with a side of fruit compote, chocolate ganache, or a dollop of whipped cream. These additions complement the cake’s airy structure and add a variety of textures and flavors.
5. Storing Leftover Cake
If you have any leftover sponge cake, it’s important to store it properly so it remains fresh. Here’s how to store it without sacrificing quality:
Airtight Container
To preserve the texture and flavor, store any leftover sponge cake in an airtight container at room temperature for up to 2 days. Be sure to place a piece of parchment paper between the cake and the lid to prevent any moisture from accumulating.
Refrigerating for Longer Storage
If you want to keep the cake for a longer period, you can store it in the refrigerator for up to 5 days. Make sure the cake is well-wrapped in plastic wrap or stored in an airtight container to prevent it from drying out.
Freezing for Future Enjoyment
Sponge cake also freezes well for longer storage. To freeze, wrap the cooled cake in plastic wrap, followed by a layer of aluminum foil, and store it in the freezer for up to 3 months. Thaw it at room temperature before serving.
Common Mistakes to Avoid When Baking a Sponge Cake
Overbeating the eggs
When baking a sponge cake, eggs play a pivotal role in achieving that perfect light and airy texture. However, like many elements in baking, there is such a thing as too much of a good thing. Overbeating the eggs is a common mistake, and it can significantly impact the quality of your sponge cake. Let’s dive into why beating eggs correctly is so important and how to avoid the common pitfall of overbeating.
1. Understanding the Role of Eggs in Sponge Cake
Before we look at how overbeating happens, it’s essential to understand the key function of eggs in a sponge cake recipe. Eggs help provide structure, moisture, and stability, but most importantly, they contribute to the cake’s lightness.
When eggs are beaten, they undergo a process known as aeration. This means that air is incorporated into the eggs, creating tiny bubbles that expand during baking. The result? A fluffy, tender crumb. Properly beaten eggs trap enough air to lift the batter and create that signature sponge texture, but too much air can create problems.
2. The Effects of Overbeating the Eggs
While the goal is to incorporate air, overbeating the eggs can cause a range of issues:
Loss of Volume
When eggs are beaten beyond the point of perfect aeration, they can lose their structure. Instead of holding tiny air bubbles, the eggs start to break down, causing the foam to collapse. This results in a batter that lacks the volume necessary for a light, fluffy sponge cake. Overbeaten eggs won’t rise properly in the oven, and your cake might end up dense or flat.
Grainy Texture
Overbeating can also cause the eggs to become grainy and unstable, leading to a less smooth batter. This can result in a grainy texture in your sponge cake, where you can actually feel the air bubbles within the crumb. The soft, melt-in-your-mouth quality of a perfectly made sponge will be compromised.
Weakened Cake Structure
In extreme cases, overbeating can make the eggs too delicate to support the batter’s structure. This can cause the cake to collapse as it bakes or while cooling. The structure may be too fragile to hold the cake up, resulting in a flat, cracked, or sunken appearance.
3. How to Avoid Overbeating the Eggs
Now that we understand the potential issues, how do we avoid overbeating and ensure we get the perfect eggs for our sponge cake? Here are some practical tips:
Beat Until Soft Peaks Form
When beating eggs, stop as soon as soft peaks form. Soft peaks are when the mixture holds its shape but the peaks at the tips slightly fall over when the beaters are lifted. This indicates that the eggs have incorporated enough air for a light, fluffy texture without going too far. You’re looking for a smooth, slightly glossy mixture rather than a dry, stiff one.
Use Medium Speed
Beat the eggs on medium speed rather than high speed. Going too fast can result in a too-rapid incorporation of air, leading to overbeating. Instead, using medium speed allows for gradual, consistent aeration, giving you more control over the consistency of the eggs.
Pay Attention to the Egg Type
Different egg sizes and conditions can impact how easily they incorporate air. Fresh, room-temperature eggs are easier to beat into a foam than cold eggs straight from the fridge. Cold eggs can create a grainy texture, which is difficult to avoid if overbeaten.
Use a Hand Mixer or Stand Mixer
While you can technically beat eggs by hand, using a hand mixer or stand mixer ensures consistent speed and control. It also reduces the chances of beating the eggs too much by hand, where it’s harder to judge the consistency.
4. Signs of Overbeaten Eggs
How do you know when you’ve overbeaten the eggs? Here are a few signs to look for:
Stiff, Dry Peaks
If you see that the peaks formed by the beaten eggs are stiff, dry, or spiky, then the eggs have likely been overbeaten. Stiff peaks are typically associated with meringue-making, but they can ruin the texture of sponge cake batter.
Foamy, Less Glossy Appearance
Overbeaten eggs can lose their gloss and become foamy or dry looking. When you reach the soft-peak stage, the eggs should still have a slightly glossy finish. If they look dry and frothy, they’ve gone too far.
Lumpy or Curdled Texture
Overbeating can also cause the egg mixture to look curdled or lumpy. If this happens, the eggs have lost their stability, and you’ll end up with a batter that is less smooth and won’t rise properly.
5. What to Do If You’ve Overbeaten the Eggs
If you realize you’ve overbeaten the eggs, there’s no need to panic—there are a few things you can try:
Incorporate New, Fresh Eggs
If you’ve overbeaten the eggs and they’ve become too dry, you can start fresh by incorporating new eggs into the batter. Gently fold them in to help regain some of the lost volume and texture.
Adjust the Mixing Method
If your eggs have lost volume, you can try adjusting the folding technique when combining them with the flour and other ingredients. This can sometimes help minimize the impact of overbeating and incorporate the ingredients more smoothly.
Underbaking the cake
While the idea of a perfectly baked sponge cake sounds simple enough, getting the baking time just right is an art that requires a careful balance. Underbaking your sponge cake is one of the most common yet avoidable mistakes that can ruin your baking efforts. Let’s dive into why underbaking happens, the signs to look for, and how to avoid this pitfall for a flawless sponge cake every time.
1. What Happens When a Cake Is Underbaked?
Underbaking occurs when the cake is removed from the oven before it’s fully cooked, resulting in a raw or partially cooked interior. While the outer layers of the cake may appear golden and firm, the inside will often be sticky, wet, or unset. In sponge cake, this can manifest as a dense, soggy texture instead of the light, airy crumb you’re aiming for.
The primary problem with underbaking a sponge cake is that the batter has not had enough time to set properly. The proteins in the eggs and the flour haven’t fully coagulated, and the cake structure hasn’t stabilized. This leads to the cake being too moist and sometimes even runny inside.
2. The Consequences of Underbaking a Sponge Cake
Underbaking doesn’t just affect the texture—it can alter the overall experience of your sponge cake. Here are a few consequences of underbaking:
Dense and Wet Center
A common symptom of an underbaked cake is a dense, wet center. The batter hasn’t fully set during baking, so the middle will remain moist, possibly even raw. This often results in a cake that feels heavy, rather than light and fluffy, and can lead to an unpleasant eating experience.
Cracked or Sunken Cake
Because the outer layers of the cake may have set while the inside remains underbaked, this can lead to a cracked or sunken appearance. When the cake is cooled, the heavier, wetter center may sink or collapse, causing an uneven shape and texture.
Poor Structure and Sticking
Underbaked cakes lack the proper structural integrity that fully baked cakes have. As a result, they may be difficult to cut or serve cleanly. The sticky, moist texture may also cause the cake to stick to your pan or other surfaces, making it harder to remove and present properly.
Unpleasant Taste and Texture
Raw batter in the center of the cake doesn’t just affect texture—it impacts the flavor as well. When underbaked, the batter might taste overly eggy, floury, or unpleasantly doughy. This defeats the purpose of achieving a delicate, balanced flavor in a perfect sponge cake.
3. Why Does Underbaking Happen?
Underbaking is often the result of a few common mistakes that are easy to overlook during the baking process:
Not Preheating the Oven
Preheating your oven is an essential first step in baking. If you don’t allow the oven to fully reach the desired temperature before placing the cake inside, it can cause uneven baking. The cake might begin baking at a lower temperature than necessary, delaying the rise and setting process.
Incorrect Oven Temperature
Even when preheated, some ovens run hotter or cooler than their temperature settings indicate, which can lead to underbaking. If your oven is too cool, the cake will take longer to bake, resulting in a dense or undercooked interior.
Opening the Oven Door Too Often
Constantly checking on your sponge cake by opening the oven door can cause a drop in temperature. The sudden coolness can disrupt the baking process, slowing the cake’s rise and resulting in uneven baking. It’s crucial to wait until near the end of the baking time to check for doneness.
Shortened Baking Time
When you’re eager to enjoy your creation, you may be tempted to pull the cake out of the oven a bit too soon. Rushing the baking time, especially when baking multiple layers or larger cakes, can leave the interior undercooked while the exterior has already set.
4. Signs That Your Cake Is Underbaked
So, how do you avoid underbaking? One key step is knowing when your cake is ready to come out of the oven. Here are some signs that your cake might still be underbaked:
The Toothpick Test
One of the most reliable ways to check the doneness of your cake is the toothpick test. Insert a toothpick into the center of the cake. If it comes out clean or with just a few moist crumbs, your cake is baked. If the toothpick comes out with wet batter clinging to it, the cake needs more time in the oven.
A Soft, Jiggly Center
If the center of the cake looks soft or jiggly when lightly touched, it’s likely underbaked. The outer edges should be firm, while the center should gently spring back when touched, indicating that the cake has set completely.
Cracked Top with Moist Texture
A well-baked sponge cake will rise evenly and have a dry, crumbly texture when cut. If the top of the cake cracks but the inside remains moist or sticky, it’s a sign that it needs more time in the oven.
5. How to Avoid Underbaking Your Sponge Cake
There are several steps you can take to ensure your sponge cake is fully baked and avoids underbaking:
Follow the Recipe’s Baking Time
Most recipes will give you an estimated baking time. However, keep in mind that oven temperatures can vary. Use the recipe’s time as a guideline, but always check doneness toward the end of the suggested baking time.
Use an Oven Thermometer
An oven thermometer will help you verify that your oven is baking at the correct temperature. Some ovens can run hotter or colder than their settings suggest, so using a thermometer ensures that your cake bakes at the right temperature.
Rotate the Cake for Even Baking
If you’re baking more than one layer or a particularly large cake, rotating the pan halfway through the baking process helps ensure that the heat is evenly distributed throughout the cake. This prevents the center from remaining undercooked while the edges cook too fast.
Don’t Open the Oven Door Too Early
Resist the urge to open the oven door too early in the baking process. This can cause a drop in temperature, affecting the rise and structure of your cake. Only open the oven when you’re ready to check for doneness toward the end of the baking time.
Let the Cake Cool Properly
Once the cake is done, remove it from the oven and allow it to cool in the pan for about 10-15 minutes. This helps the cake set fully and makes it easier to remove from the pan. If you try to remove it too soon, it may fall apart due to residual heat and underbaking.
Not leveling the batter
When it comes to baking the perfect sponge cake, one seemingly minor detail that can make a significant impact is how you level the batter in the pan. It might seem like a small step, but not leveling the batter before baking can lead to an uneven rise, resulting in a cake with inconsistent texture, shape, and appearance. Let’s dive into why leveling the batter is so important and how to do it properly to ensure a flawless sponge cake every time.
1. The Impact of an Unleveled Cake Batter
When you pour your sponge cake batter into the cake pan without leveling it, the batter will naturally pool unevenly. This leads to thicker areas and thinner areas, which causes uneven baking. The cake might rise higher in some spots while remaining flatter in others. As a result, you may end up with a lopsided cake or one that’s uneven in texture, affecting both its appearance and taste.
Here’s why this happens:
- Inconsistent Rise: The batter will rise more in the thicker sections, potentially forming uneven mounds or peaks. Thinner sections might bake faster, causing them to dry out while the thicker sections remain undercooked or soggy.
- Uneven Crumb Texture: An uneven rise leads to inconsistent texture throughout the cake. You may end up with some areas of the cake that are light and airy, while other parts are dense or even raw.
- Difficult to Frost and Decorate: If your cake is uneven, it can be difficult to frost or layer it properly. The uneven surface might cause frosting to slide off in certain areas, and layering the cake becomes a challenge, leading to a sloppy presentation.
2. Why Is Leveling the Batter So Important?
Leveling the batter ensures that the cake rises evenly, creating a consistent and smooth texture. Here are some key benefits of this simple step:
Even Rise
Leveling the batter helps the cake rise evenly throughout the pan. With an even layer of batter, the cake expands uniformly, resulting in a balanced and symmetrical cake.
Consistent Texture
When the batter is spread evenly, the cake’s texture will be consistent from edge to edge. This means you’ll enjoy the same light, fluffy, and airy texture across the entire cake without any overly dense or raw areas.
Better Presentation
A leveled batter leads to a smooth, flat cake top. This makes it easier to frost and decorate without worrying about uneven bumps or dips. A perfectly leveled cake is also more aesthetically pleasing, giving you a professional-looking result.
Ideal for Layering
If you’re making a layered sponge cake, leveling the batter is even more crucial. Uneven layers can cause one part of the cake to be taller or thicker than the other, which leads to an uneven stacking process. Leveling the batter ensures that each layer of your cake is equal, allowing for better layering and a more uniform appearance.
3. How to Properly Level Your Cake Batter
Now that we’ve covered why leveling is essential, let’s go over the best techniques to ensure your batter is evenly distributed in the pan.
Use a Spatula or Spoon to Distribute the Batter
When you first pour your cake batter into the pan, use a spatula or large spoon to gently spread it across the surface. Move the batter from the center towards the edges, making sure it fills the corners and reaches all parts of the pan. Avoid dragging or stirring too vigorously, as this can deflate the air bubbles you’ve carefully incorporated.
Tap the Pan
Once you’ve spread the batter evenly, tap the pan gently on the countertop a few times. This helps the batter settle into the pan and eliminates any large air pockets that may have formed. It also helps the batter distribute itself more evenly, ensuring the surface is smooth and flat.
Use a Leveling Tool
For those who want to take their baking precision to the next level, you can use a leveling tool. These are simple devices with a flat surface that can be used to scrape excess batter off the pan’s edges, ensuring the batter is level with the pan. You can also use the back of a spoon or an offset spatula to make sure the batter is evenly spread and flat.
Scrape Off Excess Batter
If your batter is too high in the pan after distributing it, don’t hesitate to scrape off excess from the edges. This prevents any batter from spilling over the sides while baking and ensures that the cake won’t rise unevenly.
4. Common Mistakes to Avoid When Leveling the Batter
While leveling the batter may seem simple, there are a few common mistakes to be aware of that could compromise the final outcome of your cake.
Overfilling the Pan
One mistake people often make is pouring too much batter into the pan. Filling the pan more than halfway increases the risk of batter spilling over during baking and can also result in an overly thick cake. To prevent this, always follow the recommended batter amount in your recipe and consider using a smaller pan if you have excess batter.
Overmixing the Batter
Overmixing your batter can cause the gluten to develop too much, leading to a denser texture. While leveling the batter, make sure not to stir or mix the batter too much. Once it’s in the pan, leave it as is, allowing it to naturally settle into an even layer.
Skipping the Tap
Skipping the gentle tap on the countertop can result in air bubbles trapped in the batter, which leads to an uneven texture and rise. Always give the pan a few taps to settle the batter and remove large bubbles before baking.
5. The Final Result – A Perfect Sponge Cake
By taking the time to properly level your batter, you’ll ensure an even rise, smooth texture, and professional-looking cake. This small yet crucial step contributes to achieving that perfect sponge cake—one that’s not only delicious but visually appealing as well. So, before you pop that cake into the oven, make sure your batter is evenly distributed, and you’re one step closer to creating the ultimate sponge cake!
Using the wrong pan
When it comes to baking the perfect sponge cake, one of the often overlooked elements is choosing the right pan. The type, size, and material of your baking pan can significantly affect the texture, appearance, and overall quality of the final cake. Using the wrong pan can lead to uneven baking, unwanted texture issues, or even cause your cake to fail entirely. Let’s delve into why choosing the proper pan is essential for baking the perfect sponge cake and how it impacts the baking process.
1. The Importance of Choosing the Right Size
The size of the pan you use is crucial to achieving the ideal sponge cake. If you use a pan that’s too small or too large for the amount of batter, it can throw off the texture and rise of the cake.
Too Small Pan
If you use a pan that’s too small for your batter, the cake will rise higher than intended, leading to uneven baking. The center may take longer to cook, while the edges could burn. Additionally, the cake could overflow from the sides, creating a mess in your oven.
Too Large Pan
On the other hand, if you use a pan that’s too large, the batter will spread too thin, and the cake may not rise as expected. This could lead to a flat, dry sponge cake that lacks the airy, fluffy texture you’re aiming for. The batter may bake too quickly, leaving the inside undercooked while the outside dries out.
To ensure the perfect sponge cake, it’s important to use the correct size pan recommended by your recipe. Most recipes will specify whether the cake should be baked in an 8-inch or 9-inch round pan or a specific square or rectangular pan. Always follow those measurements for best results.
2. The Impact of Pan Material on Baking
The material of the pan you choose also plays a significant role in how your sponge cake bakes. Different materials distribute heat at varying rates, which can impact the cake’s texture and the evenness of its rise.
Metal Pans (Aluminum or Steel)
Metal pans are the most common choice for baking sponge cakes. They conduct heat quickly and evenly, ensuring that the cake bakes at a consistent temperature. However, if the metal pan is too thin, it can overheat and lead to the cake browning too quickly or unevenly. On the other hand, if it’s too thick, it may result in a slower rise or uneven baking.
To get the best results, choose light-colored, thick metal pans. These provide an even heat distribution that encourages a steady rise without the risk of over-baking or undercooking the cake.
Dark-Colored Pans
Dark-colored pans absorb and retain heat more than light-colored ones. While this can be beneficial for certain types of cakes, it can cause the sponge cake to overbake or brown too quickly on the outside. This could leave the inside of the cake too wet or undercooked, making it less fluffy and airy.
If you have to use a dark-colored pan, consider lowering the baking temperature by about 10-15°C (20-30°F) to prevent the cake from browning too quickly.
Non-stick Pans
Non-stick pans are often convenient because they allow the cake to release easily. However, non-stick coatings can sometimes interfere with the rise of a sponge cake. The batter may not adhere to the sides of the pan as well, leading to a slightly less uniform rise.
To combat this, make sure to lightly grease or line the sides and bottom of the pan, even if it’s non-stick. This ensures that the batter has the proper traction to rise as it bakes, promoting an even texture.
3. The Shape of the Pan Matters
While round pans are most commonly used for sponge cakes, other shapes can sometimes be used for creative designs or different baking styles. However, it’s essential to choose the right shape based on your recipe and what you’re hoping to achieve.
Round Pans
Round pans are the go-to for sponge cakes because they allow for even heat distribution and uniform rising. They are ideal for creating a symmetrical, evenly baked cake with a smooth, flat top.
Square or Rectangular Pans
While less common for traditional sponge cakes, square or rectangular pans can be used to create sponge cakes that are cut into neat slices, perfect for serving at parties or gatherings. However, these pans may require a bit of adjustment in baking time and temperature. The larger surface area can cause the cake to bake faster and rise differently, so keep a close eye on it.
Springform Pans
Springform pans can be convenient for easier cake removal, especially if you’re planning to layer or frost your cake. However, they may not always provide the best support for a delicate sponge cake, as they don’t offer the same sturdy structure as a traditional round pan. This can lead to uneven baking or even collapsing if the sides don’t hold up well during the baking process.
If you use a springform pan, ensure that it’s well-sealed and lined with parchment paper to prevent leakage or uneven baking.
4. Proper Pan Preparation: Greasing and Lining
Even if you choose the perfect pan for your sponge cake, improper preparation can lead to issues with sticking or uneven rising.
Greasing the Pan
For most sponge cake recipes, it’s essential to lightly grease the pan with butter or oil before pouring in the batter. This ensures that the cake can be removed easily after baking. Be sure to use a light touch; excessive grease can prevent the batter from rising properly.
Lining with Parchment Paper
To further ensure that your cake comes out flawlessly, consider lining the bottom of the pan with parchment paper. This gives the cake a non-stick surface and can help the batter rise evenly without sticking to the sides.
In some cases, recipes may call for lining the sides as well to create a smooth, clean edge on your cake. You can easily cut parchment paper to fit your pan perfectly, ensuring that no batter sticks and the cake can rise to its full potential.
5. Common Mistakes to Avoid
While choosing the right pan is essential, there are a few common mistakes to avoid during this step:
Using an Old, Warped Pan
Older or warped pans can lead to uneven heat distribution, which could result in an uneven rise. Always check your pans before use to ensure they are in good condition.
Using Too Deep a Pan
A too-deep pan can lead to an undercooked cake in the center, as the batter may take too long to bake through. If you must use a deeper pan, consider lowering the baking temperature and extending the baking time slightly to ensure even cooking.
Not Considering the Material
Different pans will behave differently depending on their material. Avoid using lightweight or flimsy pans for sponge cakes, as they won’t distribute heat evenly and may lead to burnt or undercooked spots.
Baking the perfect sponge cake might seem like a delicate task, but with the right approach, it can become a rewarding and enjoyable experience. From choosing the ideal ingredients and equipment to mastering key techniques like proper folding, mixing, and baking, every step contributes to a light, airy, and moist sponge cake. Whether you’re preparing it for a special celebration or as a simple treat, understanding the essential tips and tricks makes all the difference.
By paying attention to details such as the right pan, the consistency of the batter, and avoiding common mistakes like overbeating the eggs or underbaking, you’ll set yourself up for success. With practice, you’ll soon be able to bake a sponge cake that’s not only perfect in texture but a delight to enjoy in every bite. So go ahead, embrace the joy of baking, and let the wonderful fragrance of a freshly baked sponge cake fill your kitchen.